Imagine you don’t have enough GPU to train and fine-tune the model. Your quick solution is Dreambooth, officially managed by Google is a way to fine tuning your subject with a set of relevant data. We can train any dataset like any objects, human faces, animals etc. The more detailed information can be gathered from the research paper.
Here, we are going to fine tune the pre-trained stable diffusion model with new image data set. To do this, there are multiple ways like LoRA, Hyper networks, etc. are available which we have covered.
Now, we will see what we can do using Dreambooth in Google Colab. Well, you can also do in locally to perform this operation but make sure you have at least 8GB(recommended) of VRAM.
Training Steps:
Google Colab provides the provision to test your project on the free tier. If you observe any performance issues while training then you can also switch to their paid plan. But, for tutorial, we are using the free plan.
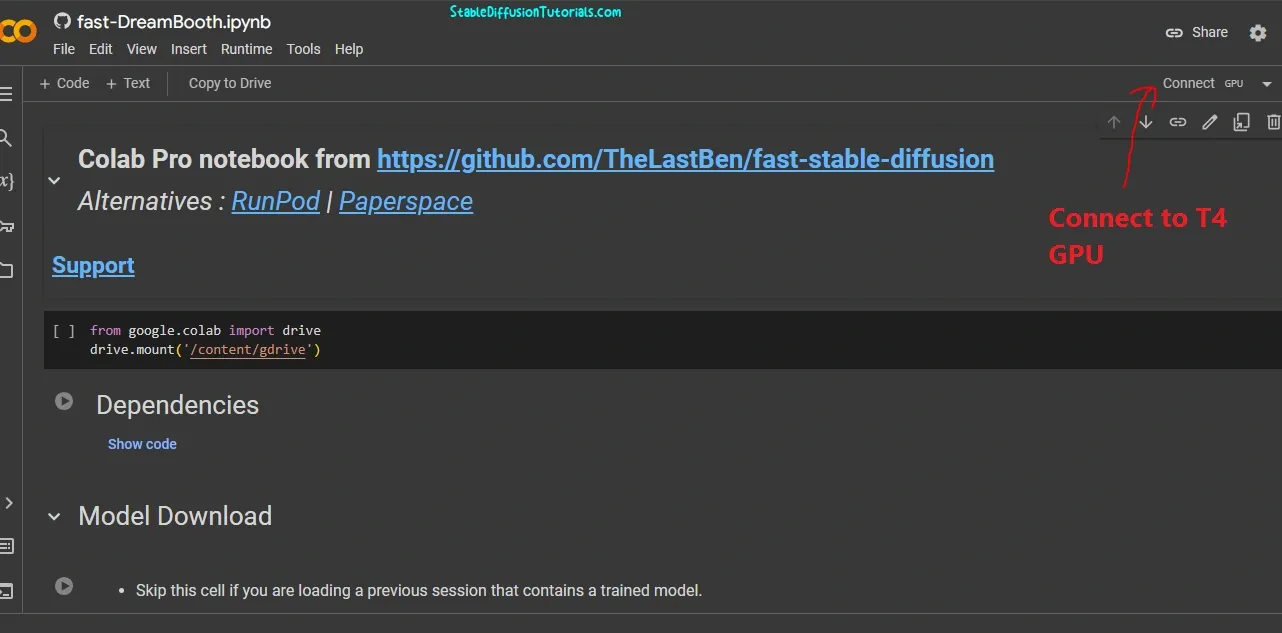
1. First, move to the Dreambooth notebook file which will open into the Google Colab provided below.
https://colab.research.google.com/github/TheLastBen/fast-stable-diffusion/blob/main/fast-DreamBooth.ipynb
2. Click on the “Connect” button to get connected to T4 GPU. It’s compulsory to activate it to use the VRAM. After getting connected it will show a green check mark.
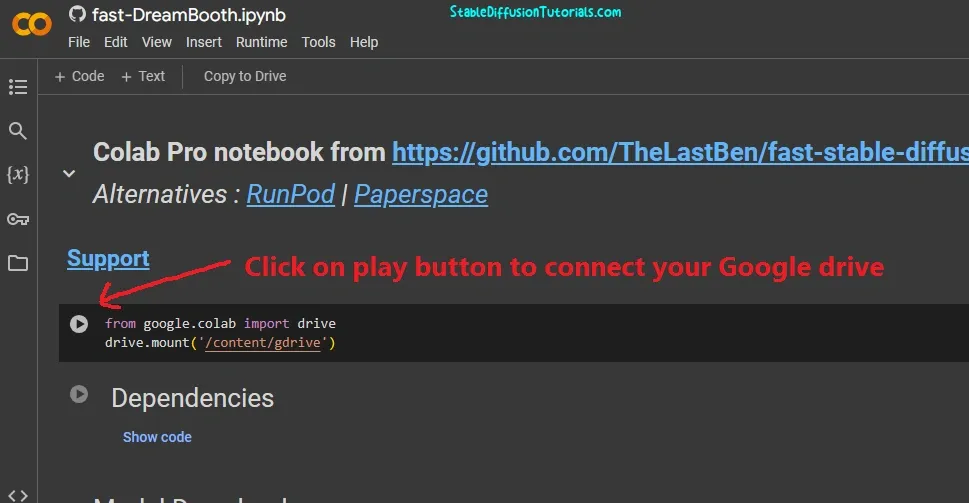
3. Next is to click on “Play” button to connect to your Google Drive. Yeah, this will use your Google Drive for temporary purpose to store the models and perquisites.
You can check the respective repository by analyzing the stars and forks it got. This signifies that how much popular GitHub repository. This determines that the community is using it aggressively and its trustworthy.
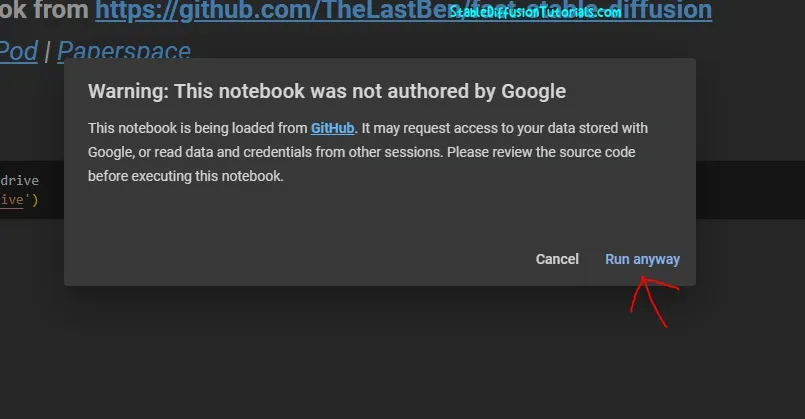
Now, click “Run anyway” and again select “Connect to google Drive“.
4. Select the model you want to do training with. By default it has Stable Diffusion1.5, you can also alternatively use different models like Stable Diffusion 2.1, Stable Diffusion XL1.0 from Hugging Face platform.
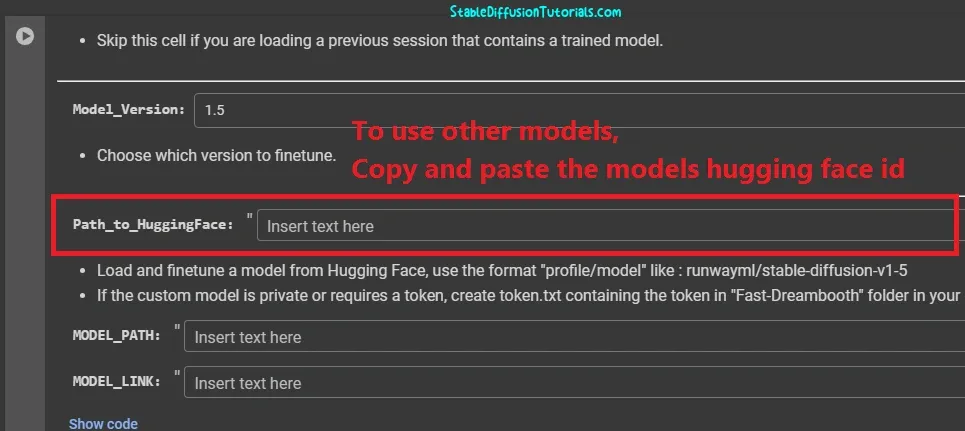
To use other models you need to just copy and paste the Hugging Face Id of any specific model into the given box “Path_to_HuggingFace“.
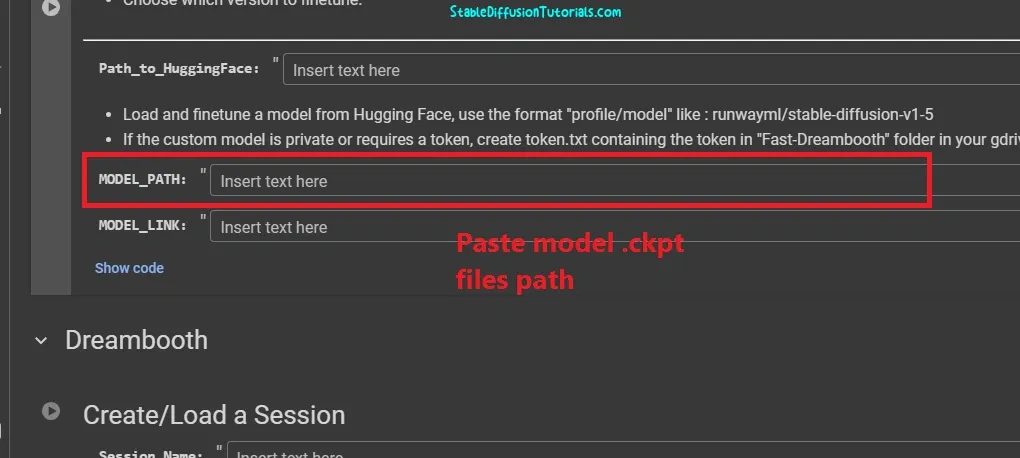
5. Other ways is that if you have the “.ckpt” files, then you can also upload them into your Google Drive and copy the its path by right clicking on it and paste into the “MODEL_PATH” section. After that just click on respective “Play” button to start the Colab session.
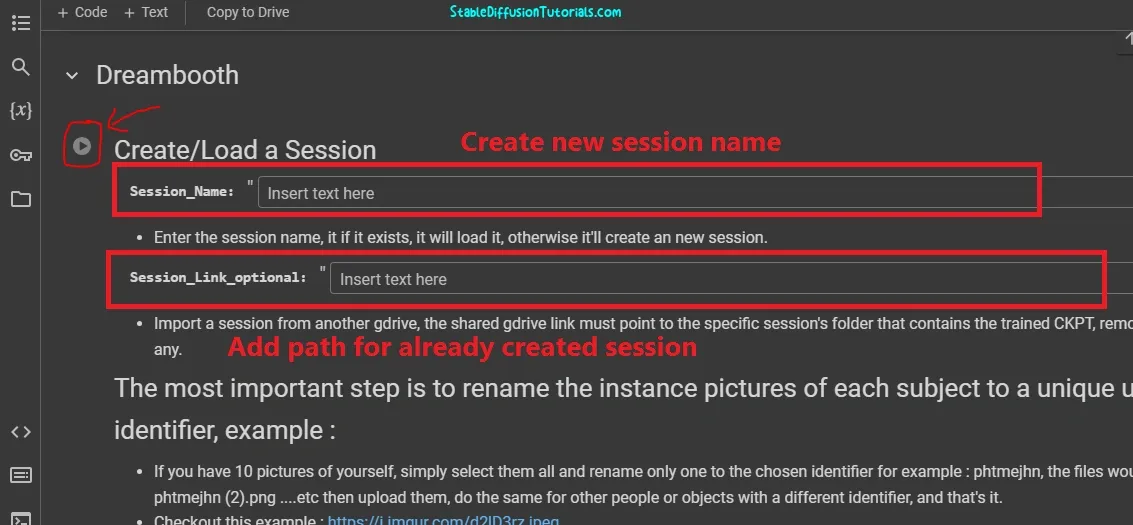
6. Now, you have to create or load your session. It means that if you are new to this Colab and doing the Dreambooth training for the first time then, you need to create a session by creating its name (You can name it anything that relate your workflow).
But if you have already created and saved the trained session (ckpt file), then simply add the path from google drive of it. Then, click the “Play” button.
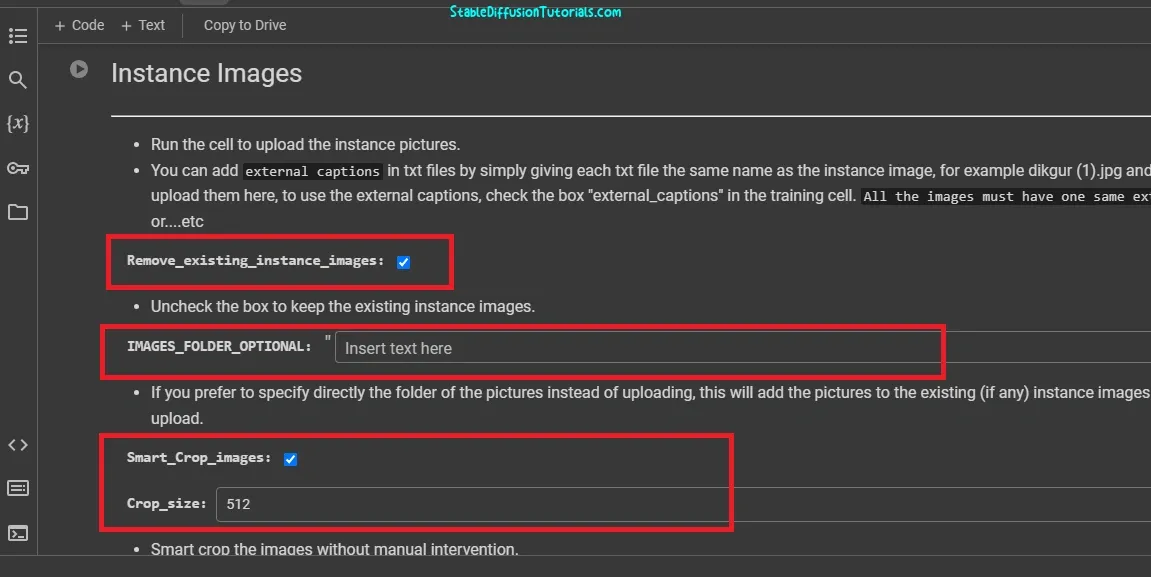
7. Instance images section: Now you will see check box “Remove_existing_instance_images“. This option is used to remove the existing images which you have previously used for training your model. Uncheck it if you are training for the first time.
8. IMAGES_FOLDER_OPTIONAL- If you don’t want to upload images from your PC/Laptop then this as an alternative. Actually, this method is used for adding the path location of your images folder which you will use to do training with. Make sure you use the Google drive folder link only.
9. Smart_Crop_Images– This option is used to crop your uploaded images. It means that uploaded images should be in the same dimensions. You can use image cropping tools like MS Paint, Photoshop or any online tool for better output because we experienced sometimes the smart cropping option doesn’t work up to mark. By default, the value is 512.
Crop_size- To crop the size mention the size in pixels like 512, 1024, or 768. However, we have selected stable Diffusion 1.5 as a pre-trained model. So, its mandatory to use 512 by 512 dimensions because the Stable diffusion1.5 has been trained on these dimensions.
If you are using Stable Diffusion XL(SDXL) then you should use 1024 by 1024 dimensions.
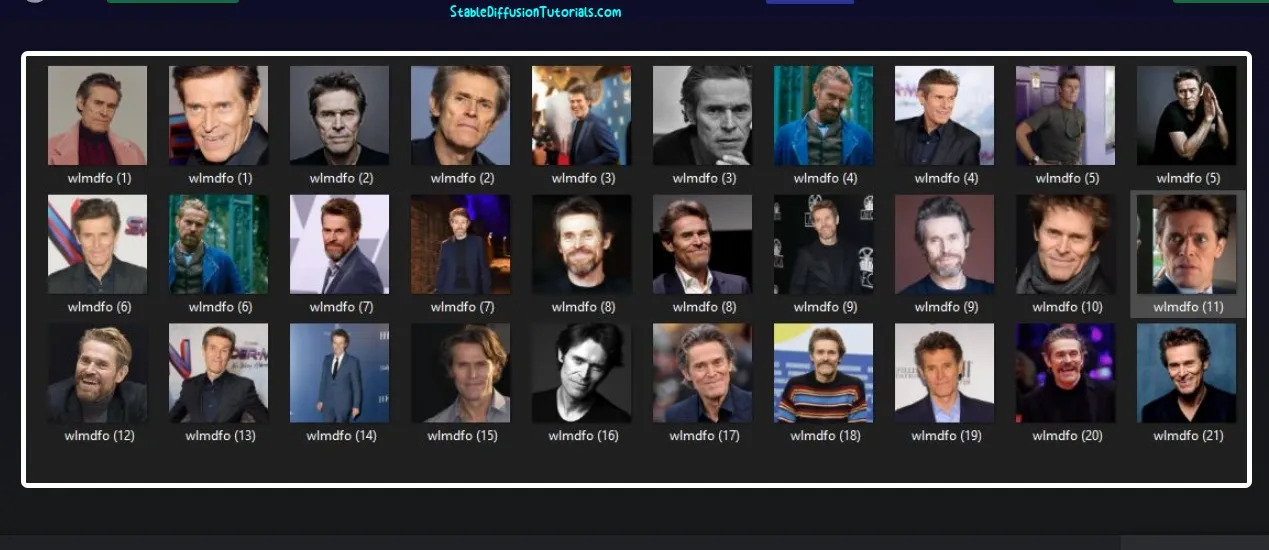
Another important thing is you also is to rename your image files into serial wise with same name as we have shown as example above. All the images should be in the same image format(which means you must not use one image in jpeg and another in PNG format).
If you are a windows user, then you need to enable the option “File name extensions” under Menu section otherwise you can’t rename the files with its extensions.
10. Now we have earlier mentioned that if you want to upload your set of images from a PC/Laptop then simply use this “Choose files” option. During the uploading process, all the image files will be shown in real time.
After uploading, a confirmation message will be shown “Done, proceed to the next cell“.
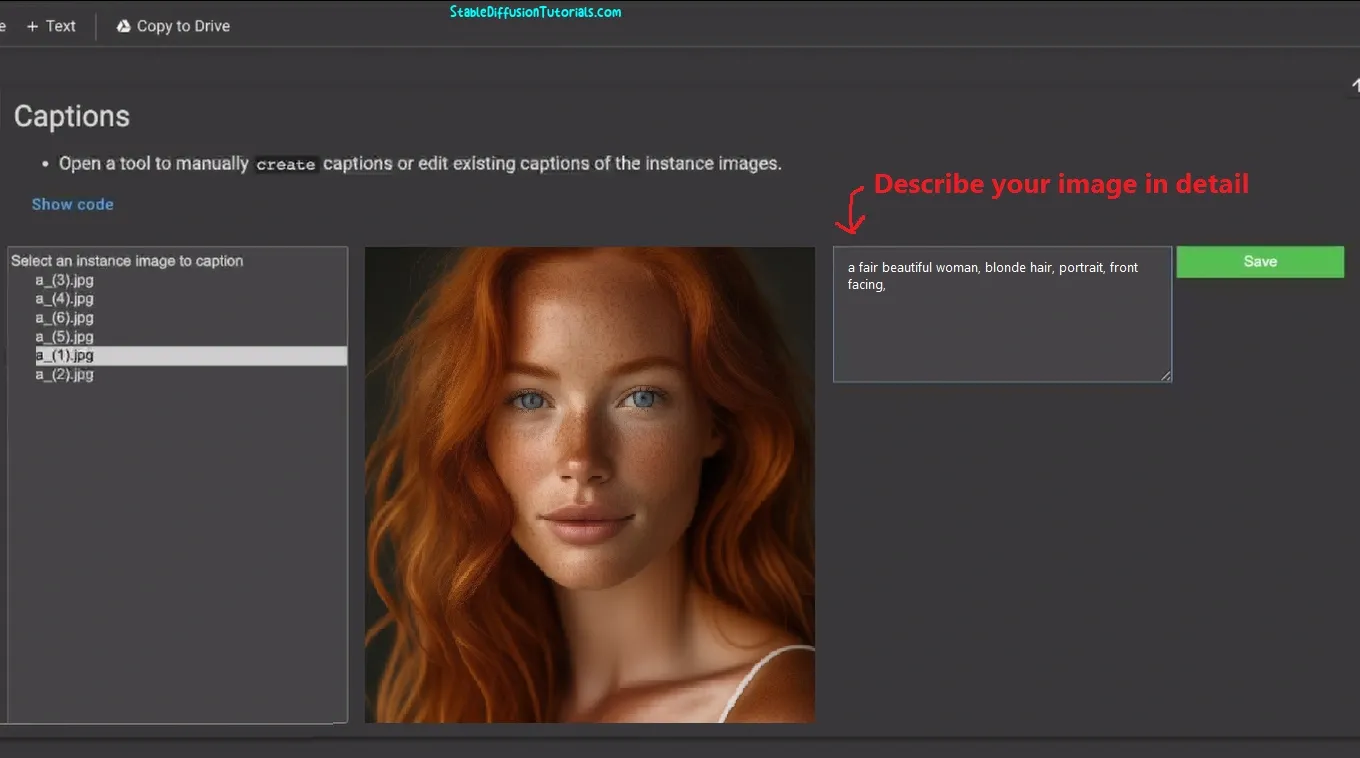
11. Caption– The Caption section is used to caption your uploaded images with a description. Run the cell by pressing the “Play” button. after a few seconds you will see all the uploaded images.
Try to rename it as what is described in the image by selecting one by one and save it. Take in mind to clearly describe the image because the better you add the relevant information the better your model will generate the results.
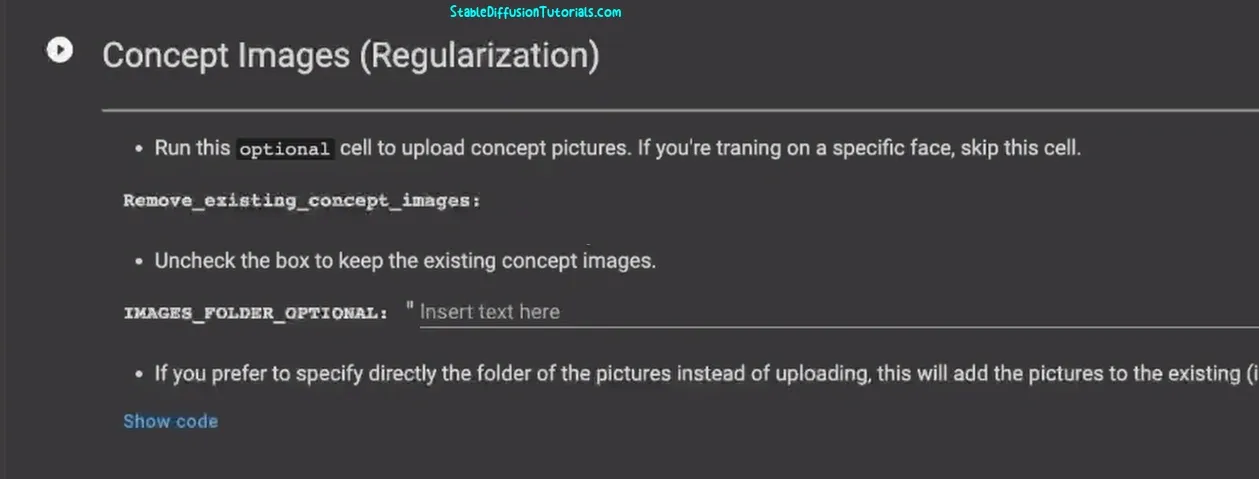
12. Concept Images(Regularization)- Well, this is optional. There are some cases where you need to train you model in some specific type or art style like Picasso, Davincii or Anime. Then you need to upload the amount of 100-300 images of a similar specific style that you have wanted. For example you want to train a cat image then you have to use only the cat’s images in different positions.
Similarly, like we explained earlier “IMAGES_FOLDER_OPTIONAL” is helps to use your Google drive folder path for Regularization images.
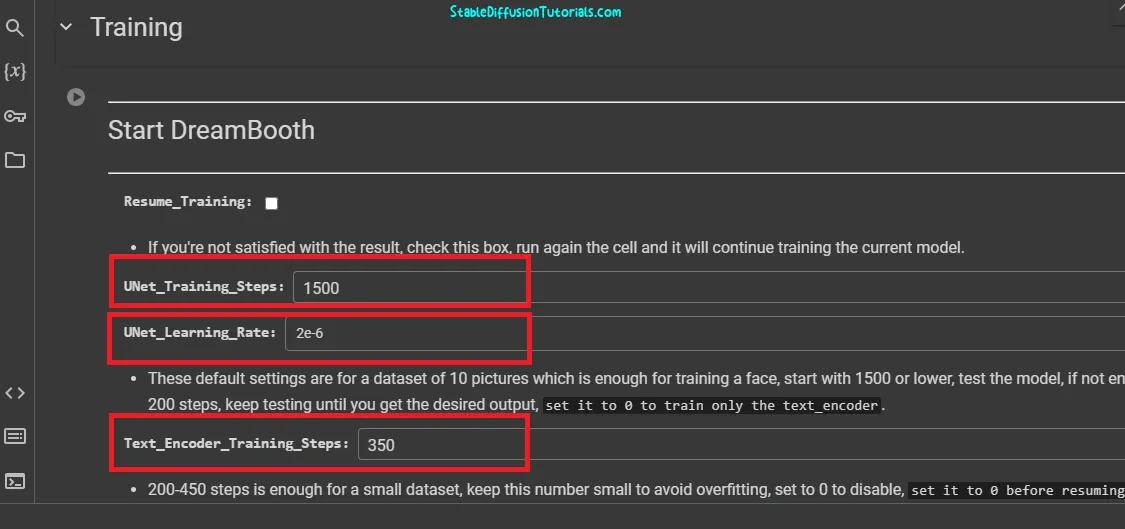
13. Training section– According to the developers of Dreambooth, Stable Diffusion easily over fits much easier. So, its to take care between its learning rate and the training steps. So, they instructed in their research paper is to use lower learning rate yielding in better results.
While training what we experienced is for human faces and objects (tabular form) the best combination is-
| Object | Human | |
|---|---|---|
| Learning Rate | 2e-6 | 1e-6 or 2e-6 |
| Training steps | 450 | 1200 or 1500 |
Here, the “Resume Training” option is used to resume the training wherever you have left it.
Now, after training if you observe that the images generated are not up to mark, like blurry, noisy then you need to play with the learning rate and training steps values.
If we don’t get satisfactory results, then we will try to change the learning rate from 1500 to ~2000. Again if this will not be perfect then we will try with learning rate 1500 with training steps of “1e-6“.
Sometimes you just don’t need to do anything.
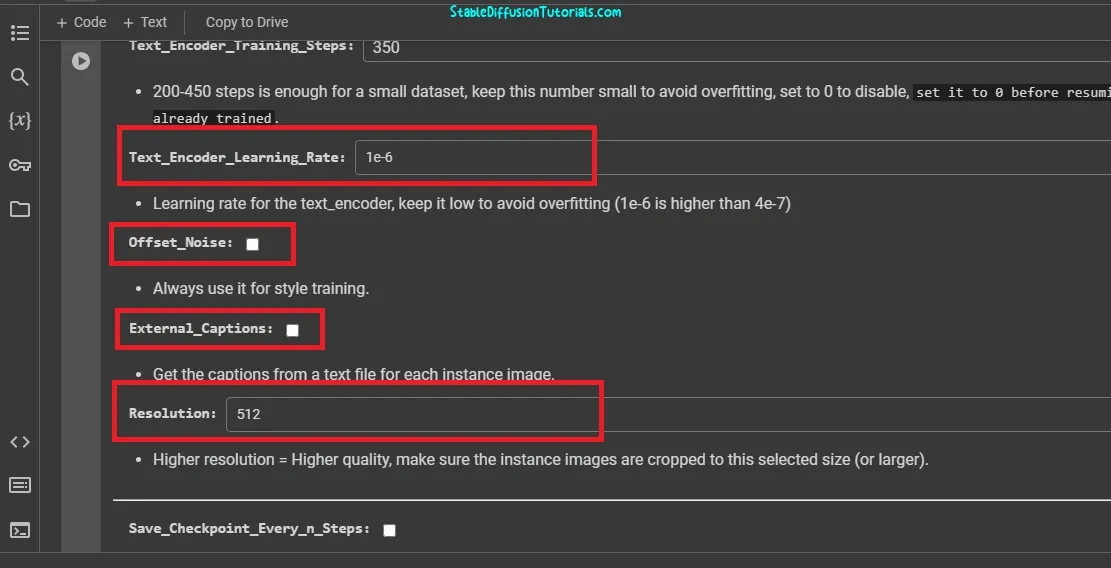
14. Text_Encoder_Training_Steps- This option is used for mentioning the steps. Usually, 200-450 is used for smaller data sets. In our case it’s a very small amount of images. So, feeding it to 200 is a good value.
15. Text_Encoder_Concept_Training_Steps- This is used when you are training an object in different positions. This is set to 0 if you are using human faces.
16. Text_Encoder_Learning_Rate- Its been instructed to keep it low to avoid over fitting (1e-6 is higher than 4e-7). This means its 1 times the power of -6 and 4 times the power of -7.
17. Offset Noise- You should use this option if you are training your model with something particular style. But, we have unchecked this because we are only training the human faces.
18. External Captions- This is for external text files with captioning. It can be left as it is.
19. Resolution- Make sure to use the lower value as compared with the resolution you have set in after cropping the images. For instance, if you have uploaded images with 1024 pixels then you should set it between 512-960.
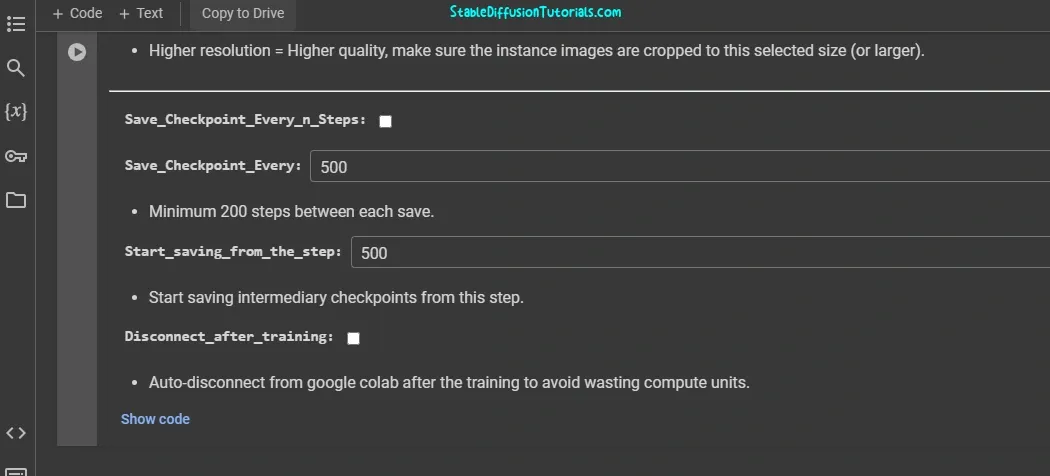
20. Save_Checkpoint_Every_n_Steps- Because training takes almost 20-30 minutes, an option to save your checkpoints with every step has been provided.
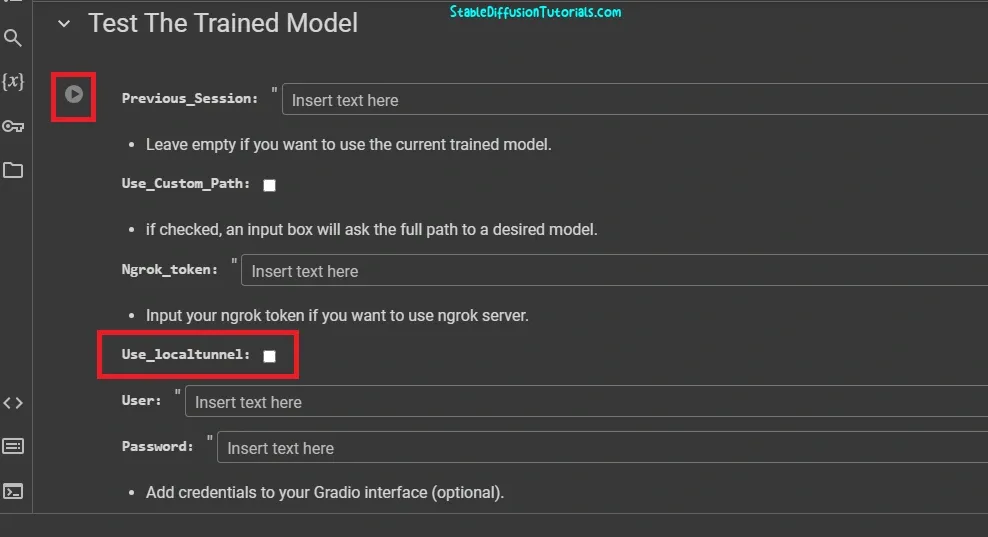
21. Test the trained model- This section is used to testing the already trained model. This will open the Stable Diffusion WebUI for using your local tunnel. To use this, you need to check the “Use_localtunnel” option.
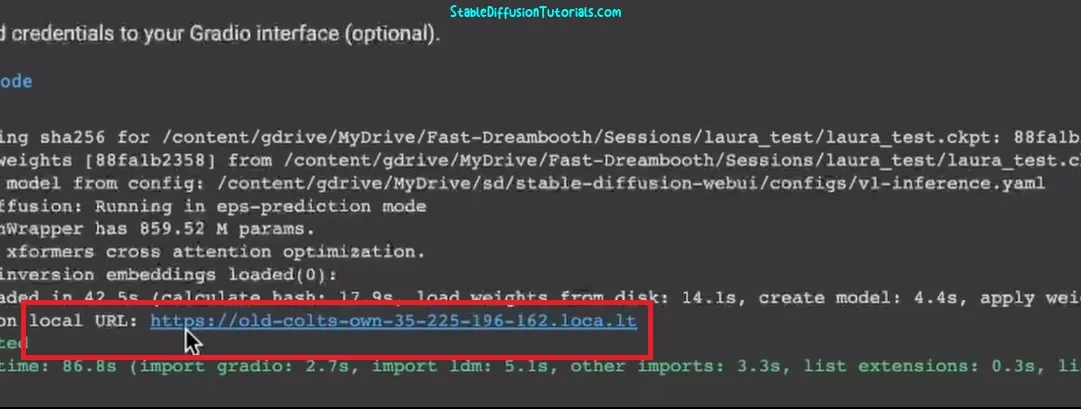
The alternate way is to use the Gradio app with your credentials. Now, you can run the cell by clicking on the play button.
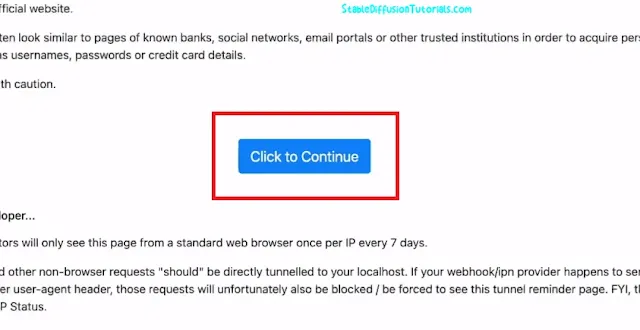
After a few seconds, you will see a live URL. Click on it to open a WebUI.
22. Save your trained model to Hugging Face– After training your model, you can sign in to the Hugging Face account and save your models as your repository. Now, if you want to load your saved model then simply copy its Hugging Face ID and paste in Path_to_HuggingFace and use it in your workflow.
Important Tips:
According to the research paper, if you are not getting the perfect results in image generation then you should try some tweaking with the parameters which we have mentioned below:-
- Try different sampling methods like Euler, DDIM or DPM++, etc.
- Be focused on detailing when putting your image prompt.
- Use negative prompts to add more perfection.
- Symbols can also be used to give more importance.
- Set the CFG scale to low from 7-15 for more creativity.
- Using Sampling Steps values of 20-25 will be better but the generation time will be comparatively longer.

