If you are struggling in attempting to generate any style with the referenced image then IP Adapter (Image Prompt Adapter) will prove to be the live saver.
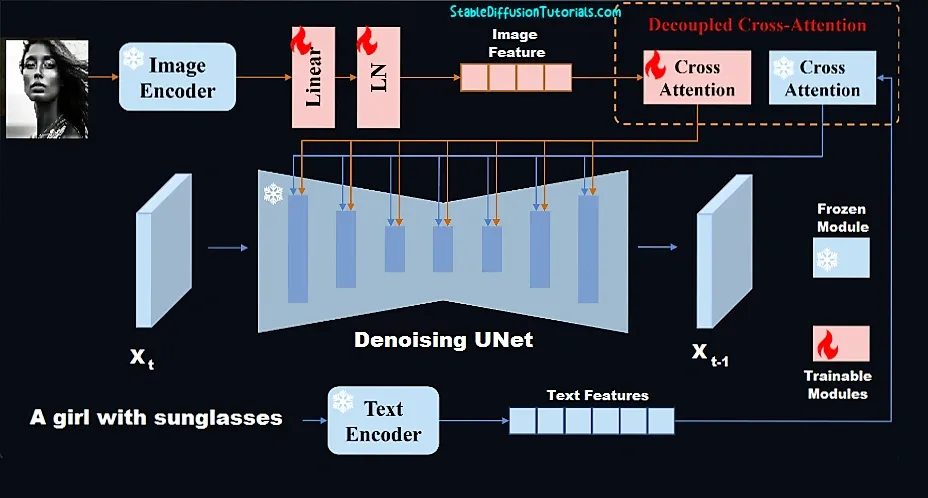
According to the research paper, this method helps the pre-trained diffusion models to create images in any art style. We used to fine-tune the pre-trained models for generating images with different styles with poses. But, IP Adapter claims to generate quite good results as compared to fine-tuned models.
Features:
1. Most suitable for beginners who don’t want to get into complicated stuff.
2. Don’t need to train or fine-tune diffusion models
3. Saves time because you don’t need any training
4. Capable of running in production which saves storage for trained models.
5. ImageGen in any style in a controlled environment.
Installation in Automatic1111:
0. First, install and update Automatic1111 if you have not yet.
1. Make sure you have ControlNet SD1.5 and ControlNet SDXL installed.
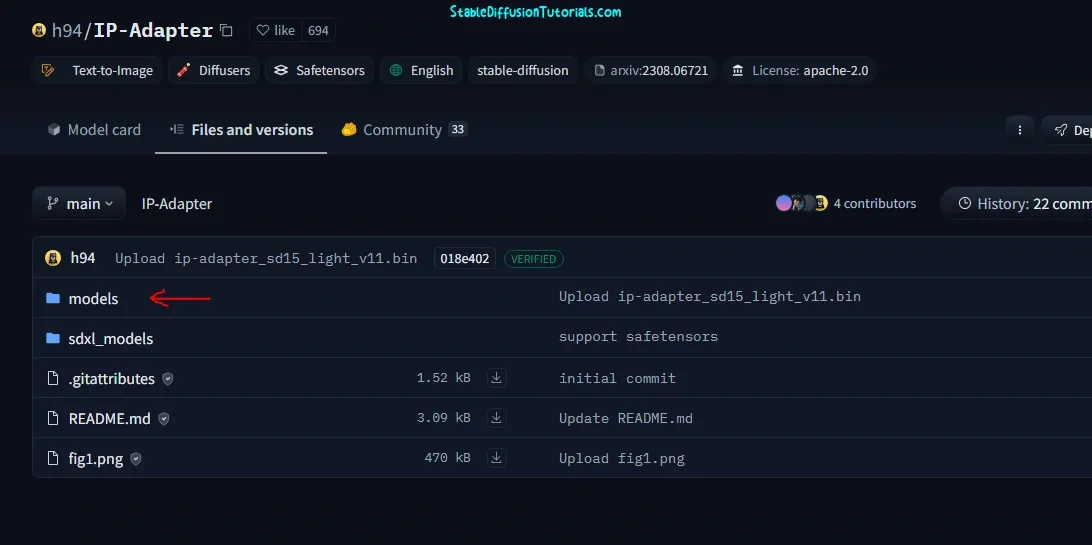
2. Navigate to the recommended models required for IP Adapter from the official Hugging Face Repository, and move under the “models” section.
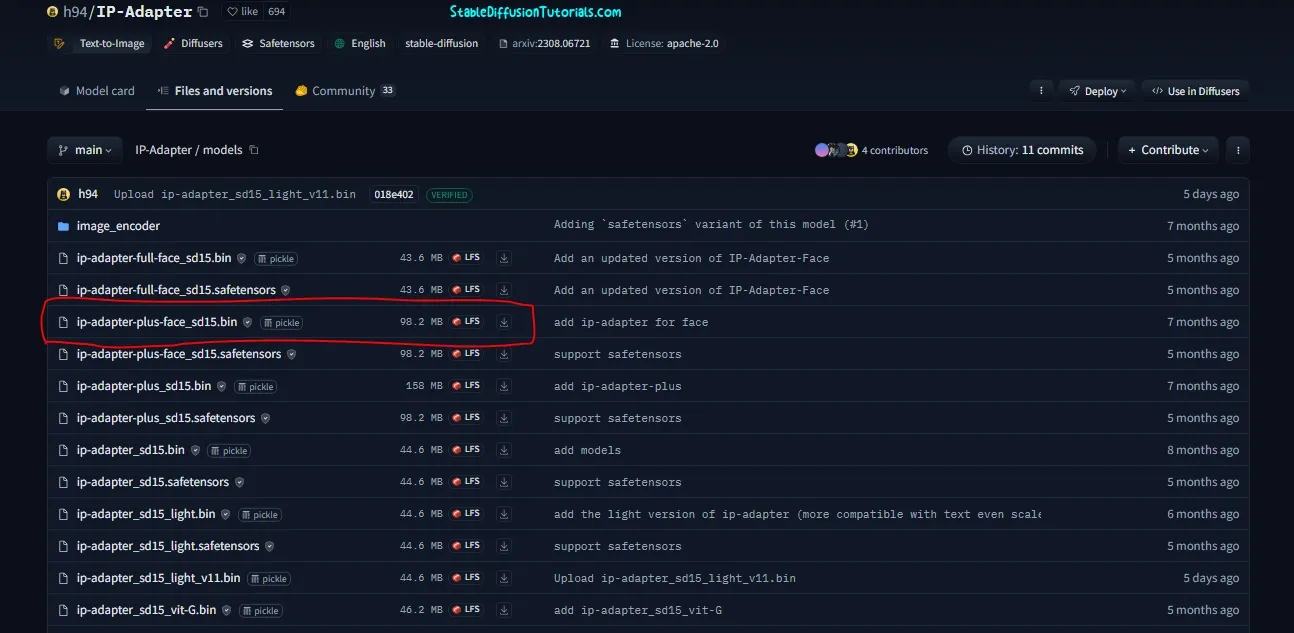
Download the IP adapter “ip-adapter-plus-face_sd15.bin” model and rename its extension from “.bin” to “.pth” before using it.
And put them into your “stable-diffusion-webuiextensionssd-webui-controlnetmodels” or “stable-diffusion-webuimodelsControlNet” folder.
3. Again, move to the repository for SDXL collection and download the three updated IP Adapter models from Hugging Face.
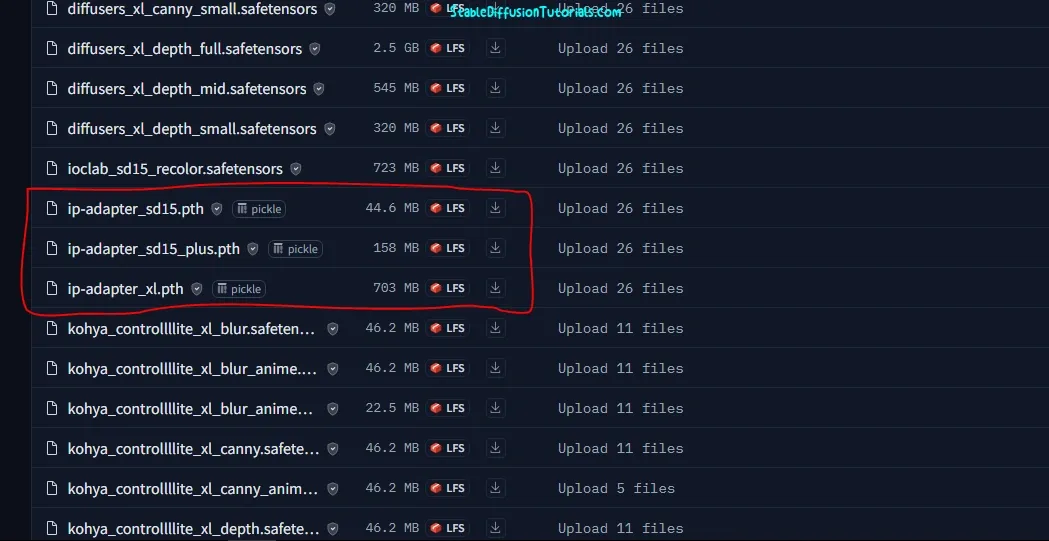
Also, download these files:
- ip-adapter_sd15.pth
- ip-adapter_sd15_plus.pth
- ip-adapter_xl.pth
And put them into your “stable-diffusion-webuimodelsControlNet” folder.
4. For the illustration, we are using two checkpoints. Download the Realistic Vision(SDXL base1.0) and the Rev Animated(Stable Diffusion1.5) from CivitAI, you can use other relevant models for your workflow, but we are using these:
- Realistic Vision5.1(SDXL base1.0) (download Inpaiting and safetensor files)
- Rev Animated(Stable Diffusion1.5)
And store them in checkpoints folder. Also at last you need to download the relevant VAE and store them in “VAE” folder.
5. Now, open your Automatic1111 and use these settings to work with the workflow.
IP Adpater Workflow(Automatic1111):
Method1 (Generating final image with the reference one):
Here, we want to generate an image with different styles and objects. Let’s say we want to generate an image with red sunglasses with the same face.
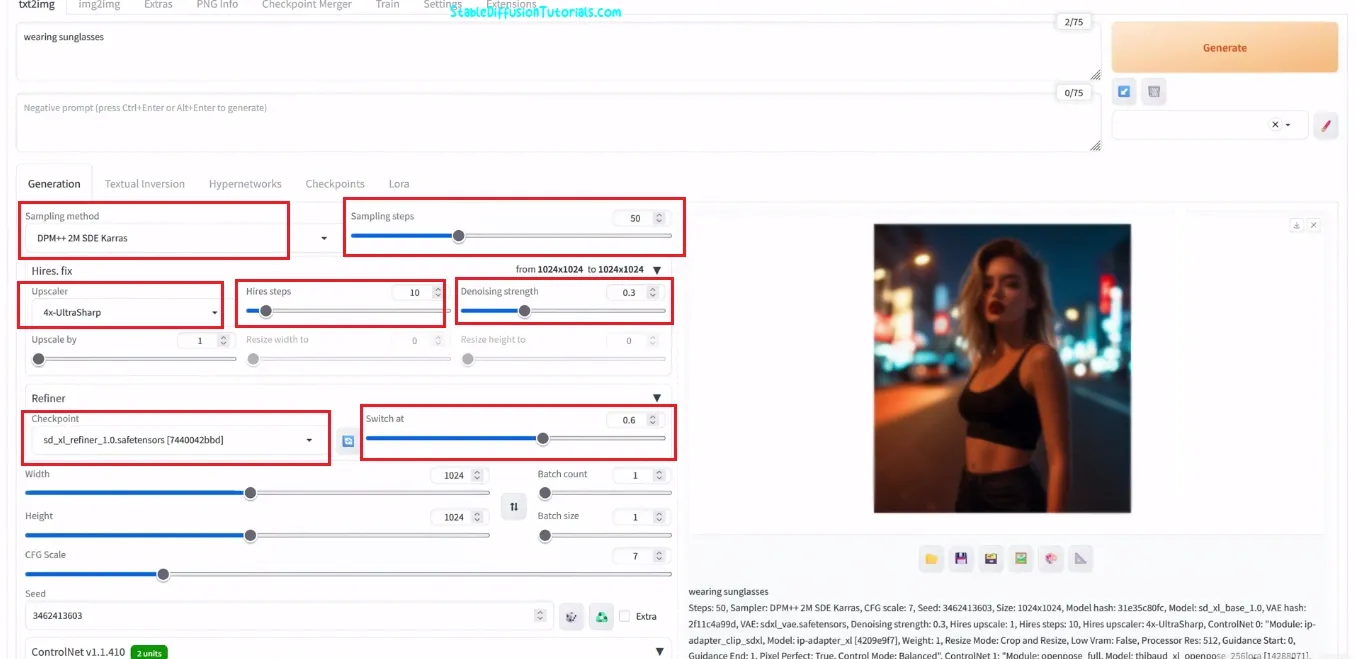
Select txt2img tab and setup these settings-
-positive prompt: “wearing sunglasses“
-Sampling Method: DPM++ 2M SDE Karras
-Sampling Steps: 50
-Hires Fix: Upscaler-4x, Hires Steps:10, Denoising Strength: 0.3
-Width:1024
-Height:1024
-Refiner: SDXL Refiner 1.0
-Switch at :0.6
ControlNet Unit0 tab: Drag and drop your reference image (pose/style)
“Enable” check box and Control Type: Ip Adapter
Preprocessor: Ip Adapter Clip SDXL
Model: IP Adapter adapter_xl
ControlNet Unit1 tab: Drag and drop the same image loaded earlier
“Enable” check box and Control Type: Open Pose
Preprocessor: Open Pose Full (for loading temporary results click on the star button)
Model: sd_xl Open pose
And Select “Generate” button to create your new style of image art.
We tried multiple times with sunglasses wearing.


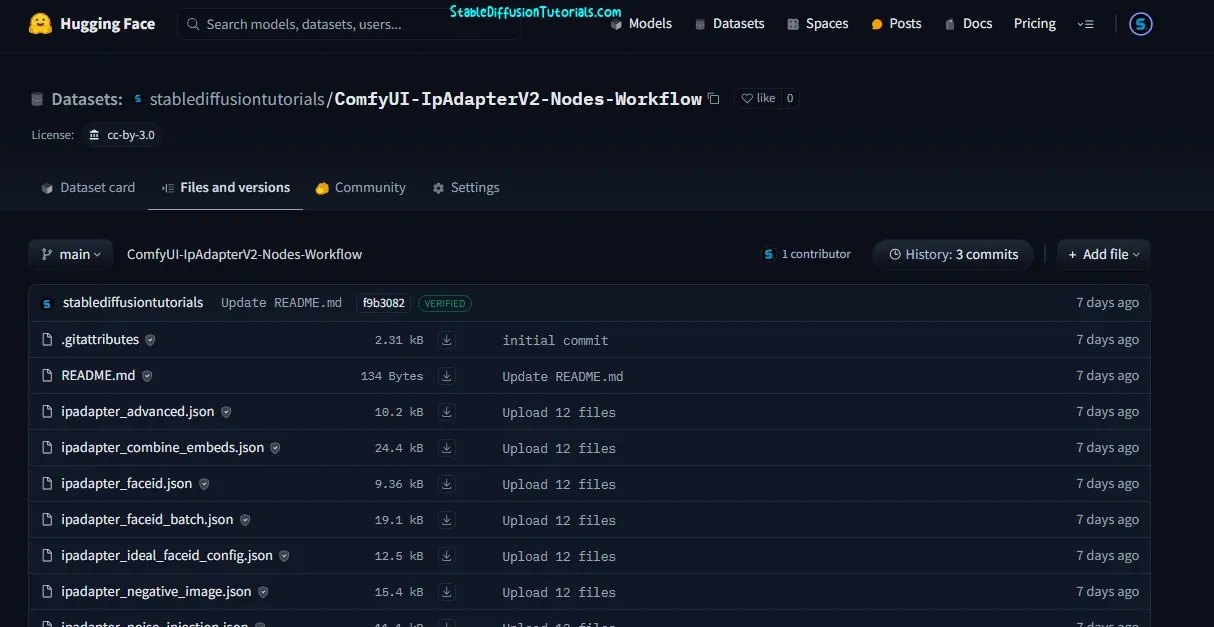
Installation in ComfyUI:
Instructions:
- IP Adapter(V1)– If you don’t want to destroy the previous workflow with an older IP adapter then you don’t have to upgrade to V2, but due to its deprecation you don’t get future updates.
-
IP Adapter(V2)– Although you want to upgrade to IP adapter V2 and want regular updates then, you need to rebuild the new workflow from scratch, because the previous workflowwill not be compatible. And you have to leave your previous workflows.
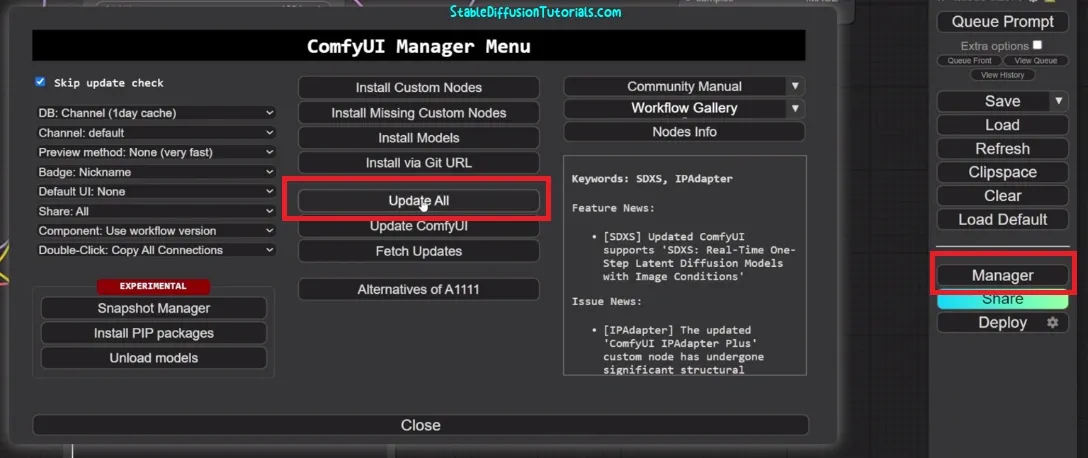
Upgrading to IP Adapter V2:
| Sl. no | Rename downloaded model(Copy it) | Download | Details |
|---|---|---|---|
| 1. | CLIP-ViT-H-14-laion2B-s32B-b79K.safetensors | Link | (This is the first model name) |
| 2. | CLIP-ViT-bigG-14-laion2B-39B-b160k.safetensors | Link | (This is the second model name) |
If you are a windows user, then you need to enable the option “File name extensions” under Menu section otherwise you can’t rename the files with its extensions.
| Sl No. | Model Name | Description |
|---|---|---|
| 1 | ip-adapter_sd15.safetensors | Basic model, average strength |
| 2 | ip-adapter_sd15_light_v11.bin | Light impact model |
| 3 | ip-adapter-plus_sd15.safetensors | Plus model, very strong |
| 4 | ip-adapter-plus-face_sd15.safetensors | Face model, portraits |
| 5 | ip-adapter-full-face_sd15.safetensors | Stronger face model, not necessarily better |
| 6 | ip-adapter_sd15_vit-G.safetensors | Base model, requires bigG clip vision encoder |
| 7 | ip-adapter_sdxl_vit-h.safetensors | SDXL model |
| 8 | ip-adapter-plus_sdxl_vit-h.safetensors | SDXL plus model |
| 9 | ip-adapter-plus-face_sdxl_vit-h.safetensors | SDXL face model |
| 10 | ip-adapter_sdxl.safetensors | vit-G SDXL model, Requires bigG clip vision encoder |
| 11 | (Deprecated) ip-adapter_sd15_light.safetensors | v1.0 Light impact model |
| Sl No. | Model Name | Download | Description |
|---|---|---|---|
| 1 | ip-adapter-faceid_sd15.bin | Link | Base FaceID model |
| 2 | ip-adapter-faceid-plusv2_sd15.bin | Link | FaceID plus v2 |
| 3 | ip-adapter-faceid-portrait-v11_sd15.bin | Link | Text prompt style transfer for portraits |
| 4 | ip-adapter-faceid_sdxl.bin | Link | SDXL base FaceID |
| 5 | ip-adapter-faceid-plusv2_sdxl.bin | Link | SDXL plus v2 |
| 6 | ip-adapter-faceid-portrait_sdxl.bin | Link | SDXL text prompt style transfer |
| 7 | ip-adapter-faceid-plus_sd15.bin (Deprecated) | Link | FaceID plus v1 |
| 8 | ip-adapter-faceid-portrait_sd15.bin (Deprecated) | Link | v1 of the portrait model |
| Sl No. | Model Name | Download | Description |
|---|---|---|---|
| 1 | ip-adapter-faceid_sd15_lora.safetensors | Link | For SD1.5 |
| 2 | ip-adapter-faceid-plusv2_sd15_lora.safetensors | Link | For SD1.5 |
| 3 | ip-adapter-faceid_sdxl_lora.safetensors | Link | SDXL FaceID LoRA |
| 4 | ip-adapter-faceid-plusv2_sdxl_lora.safetensors | Link | SDXL plus v2 LoRA |
| 5 | ip-adapter-faceid-plus_sd15_lora.safetensors (Deprecated) | Link | LoRA for the deprecated FaceID plus v1 model |
IP Adapter Workflow (ComfyUI):
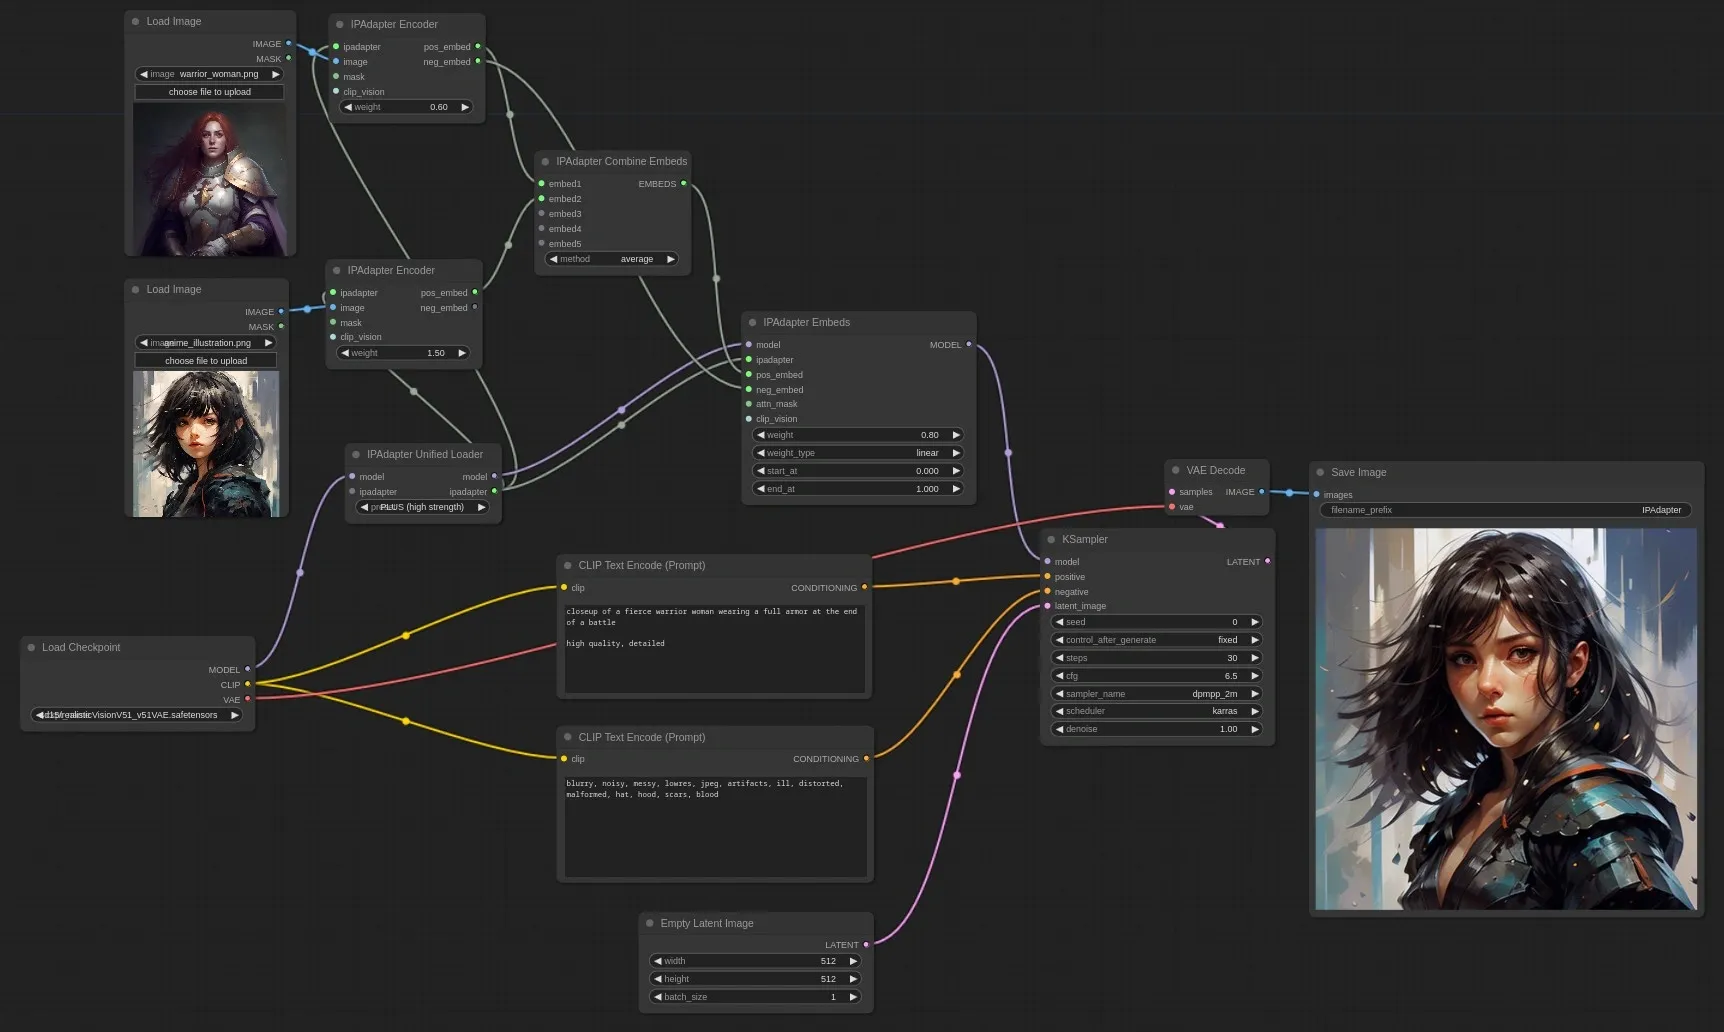 |
| Image source: IP Adpater (Matteo’s) Github repository |
Error while upgrading to IP Adapter V2:

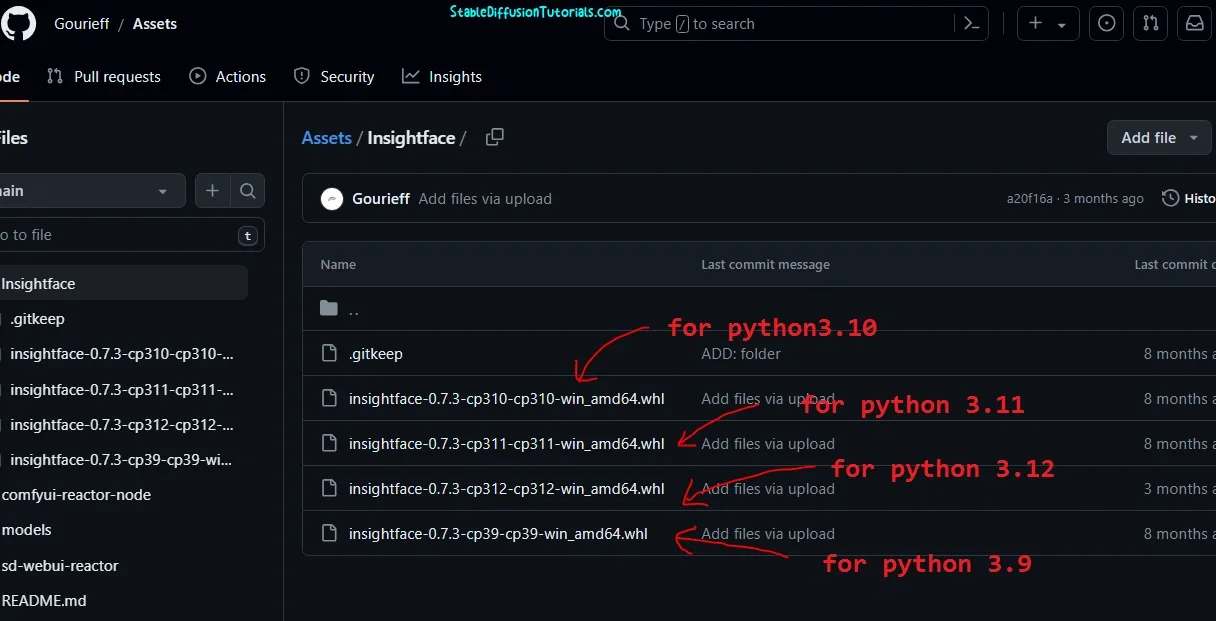
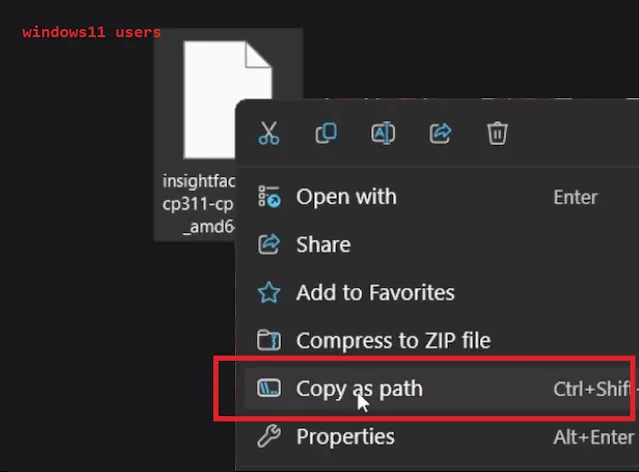
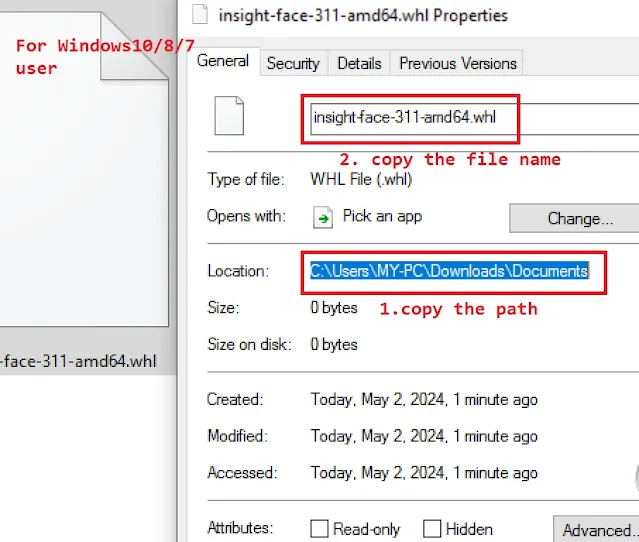
- Paste the path of your python.exe file and add extra semicolon(;). To get the path just find for “python.exe” file inside “comfyuipython_embeded” folder and right click and select copy path.
- Paste the path of python python_embeded folder. To get the path just find for “python_embeded” folder, right click and select copy path.
- Paste the path of python Scripts folder. To get the path just get the “Scripts” folder, right click and select copy path.
