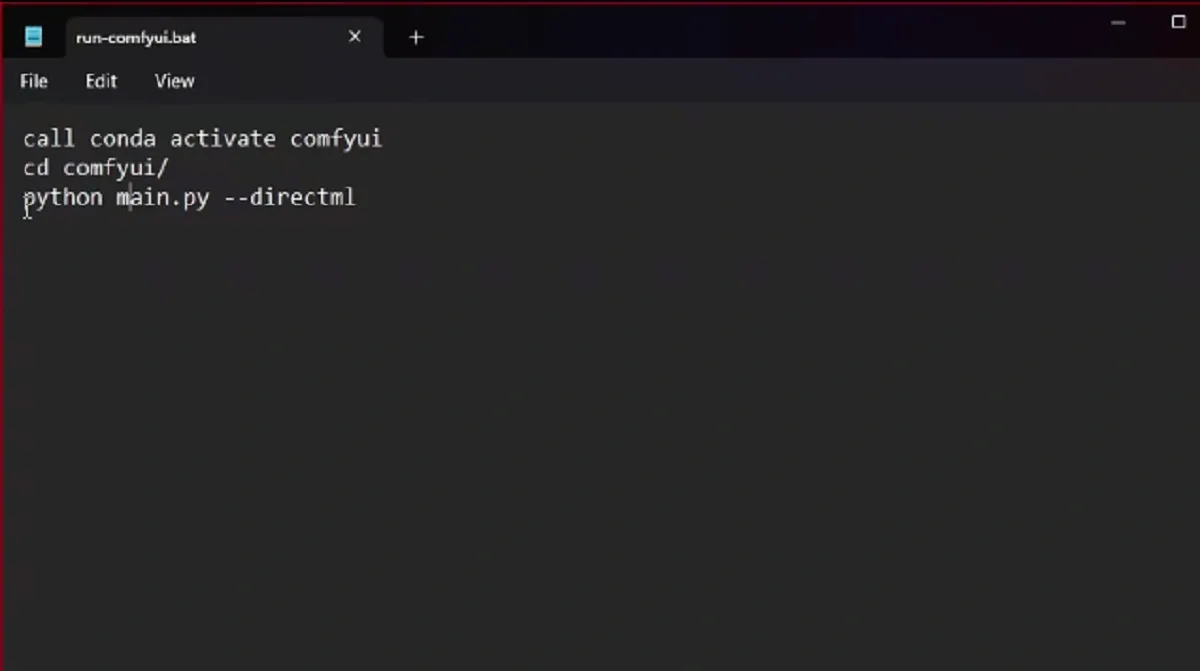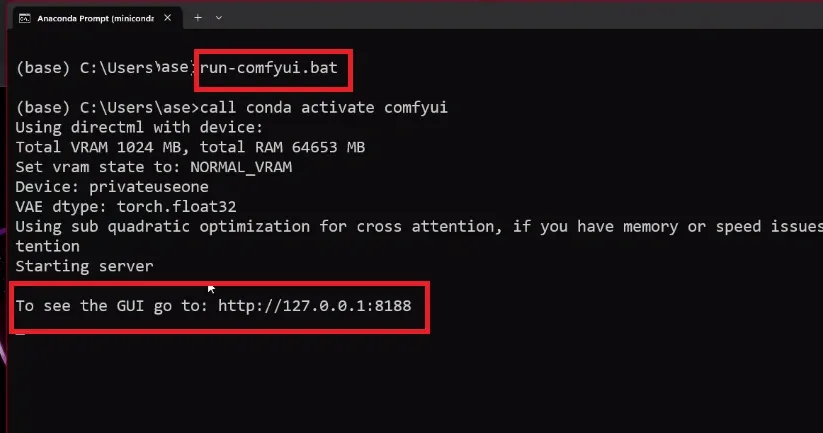
After a huge boom of image generation models released into the internet, NVIDIA has grabbed the opportunity to support this image generation era. But, due to its monopoly in the market of the powerful GPUs, we had no options.
But, after a long wait a new alternative has emerged that is AMD’s GPUs.
Yeah, AMD and Microsoft working a lot to compete with NVIDIA which is the game changer moment for us in the field of image generation. Now, we have the affordable option to work with not only in gaming but in image generation as well.
In this post, we will walk you through how to get the AI image generation software Stable Diffusion running on AMD Radeon GPUs. We will try to keep things simple and easy to follow.
Requirements:
Here’s what you need to use Stable Diffusion on an AMD GPU:
– AMD Radeon 6000 or 7000 series GPU
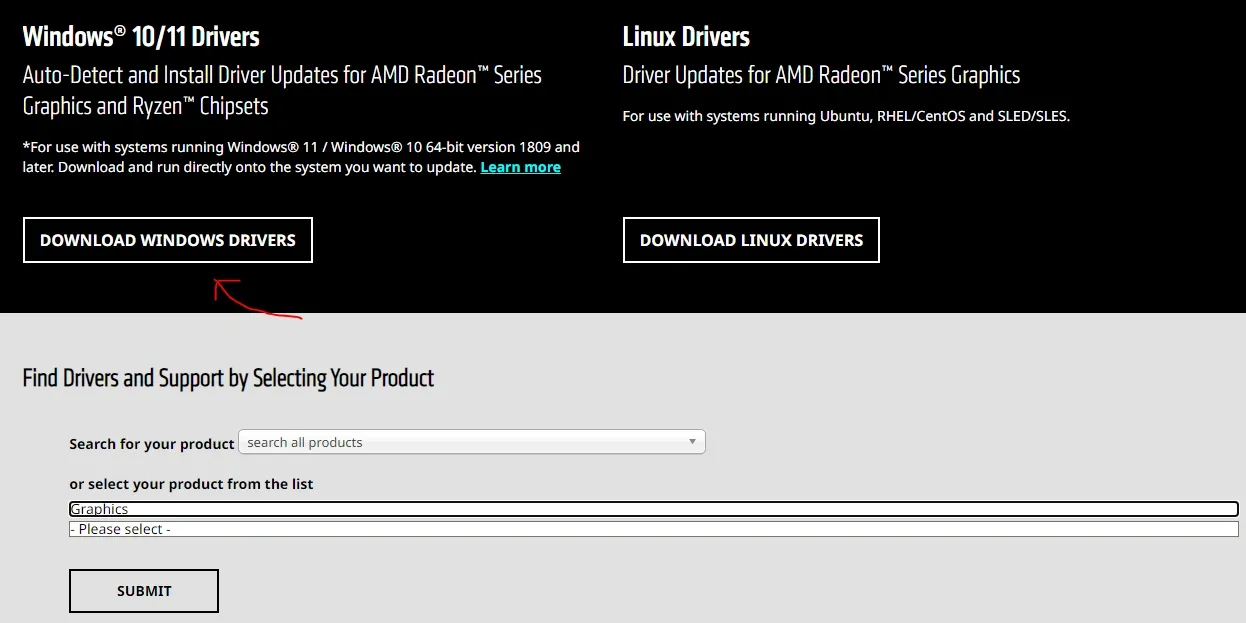
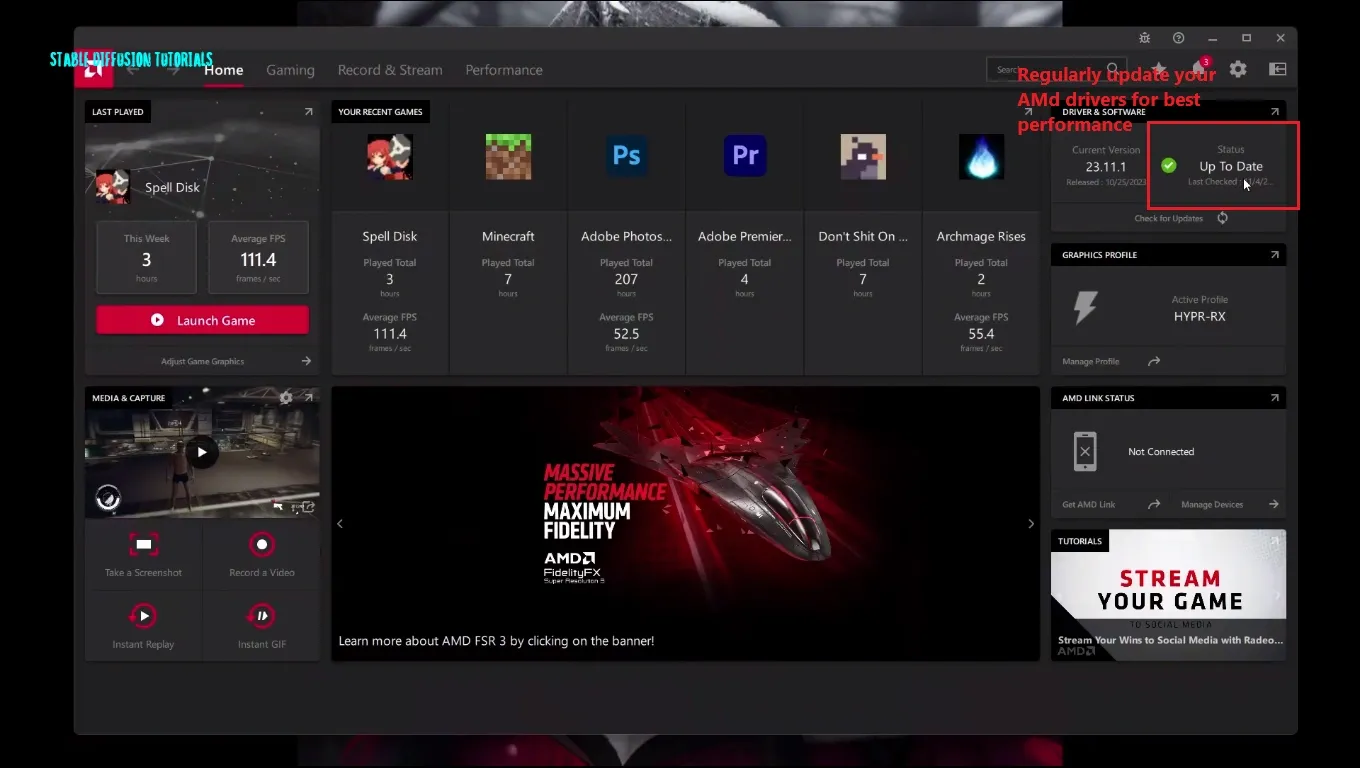
– Latest AMD drivers
– Windows 10 or 11 64-bit
– At least 8GB RAM
– Git and Python installed
We are running it on a Radeon RX 6800 with a Ryzen 5 3600X CPU and 16GB VRAM.
There’s a cool new tool called Olive from Microsoft that can optimize Stable Diffusion to run much faster on your AMD hardware. Microsoft Olive is a Python program that gets AI models ready to run super fast on AMD GPUs. It takes existing models like Stable Diffusion and converts them into a format that AMD GPUs understand.
It also compresses and shrinks down the model so it takes up less space on your graphics card. This is important because these AI models have millions of parameters and can eat up GPU memory in so instant.

Features:
When preparing Stable Diffusion, Olive does a few key things:
–Model Conversion: Translates the original model from PyTorch format to a format called ONNX that AMD GPUs prefer.
–Graph Optimization: Streamlines and removes unnecessary code from the model translation process which makes the model lighter than before and helps it to run faster.
–Quantization: Reduces the math precision from 32-bit floats to 16-bit floats. This shrinks the model down to use less GPU memory while retaining accuracy.
This lets you get the most out of AI software with AMD hardware. It automatically tunes models to run quicker on Radeon GPUs.
Installation of Automatic1111 with Microsoft Olive:
The installation has a few steps, but it’s pretty easy. Here’s what you need to do:

1. First of all, install Git for windows.
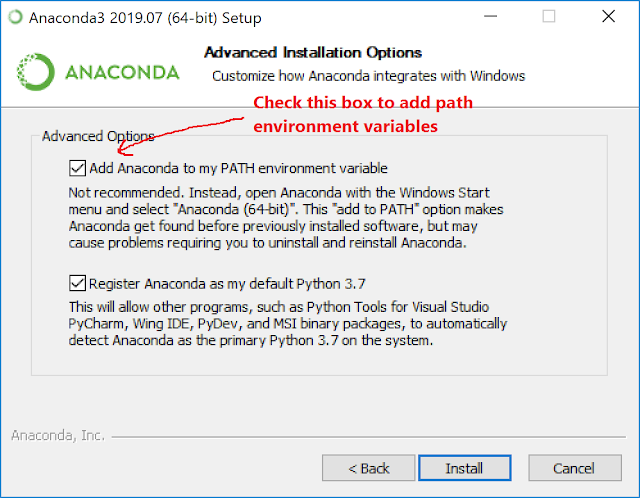
2. Now, install Anaconda or Miniconda from their official home page. (Make sure you add the Anaconda or Miniconda directory path into the environment variable while installing it.)
4. Open Anaconda or Miniconda Terminal, whatever you have installed.
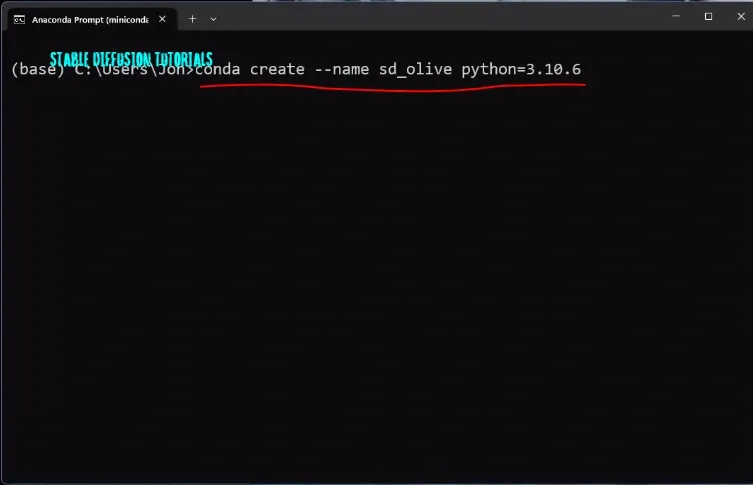
5. Create a new environment by typing the following commands onto your command prompt:
Here, Python minimum 3.9 version is required. We are using Python 3.10.6 version. So, we have to install and create the environment with the required version by typing these commands. Here, “sd_olive” is the name we defined for virtual directory. You can choose yours but make sure not to use any predefined python keywords.
conda create –name sd_olive python=3.10.6
If you found an error (“no python found“), means that you are facing python version compatibility issues. What we experienced is to install python 3.10.6 version or python 3.10.9 version. Right now python 3.11x versions are not supported.
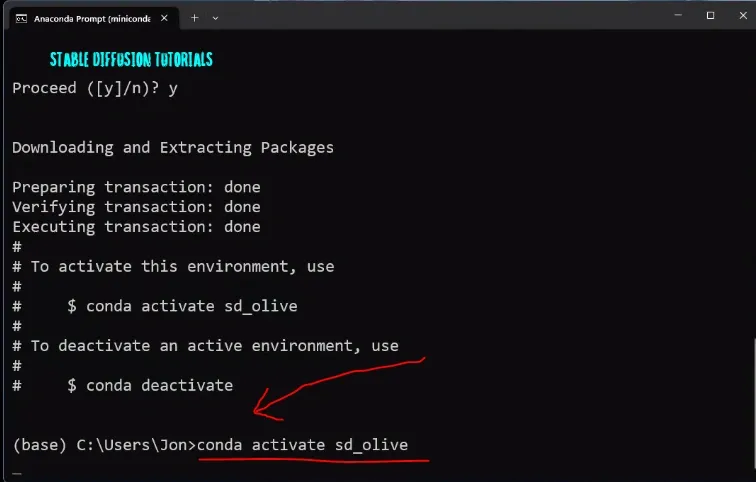
6. Now, activate the environment:
conda activate sd_olive
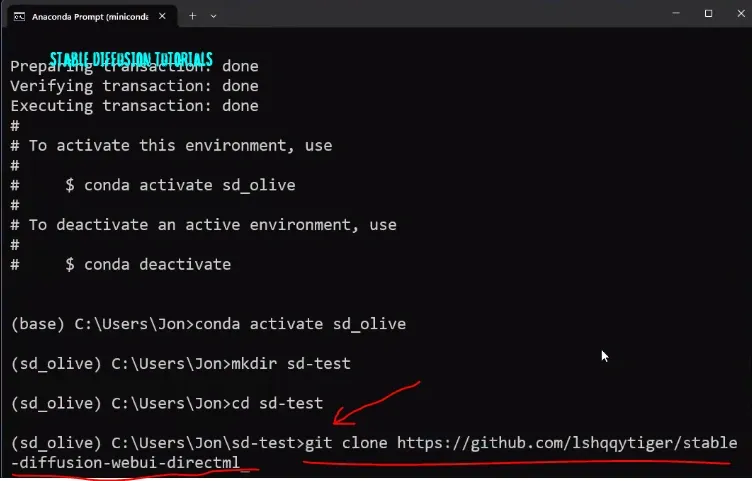
8. Clone the GitHub repo by typing this command:
git clone https://github.com/lshqqytiger/stable-diffusion-webui-directml
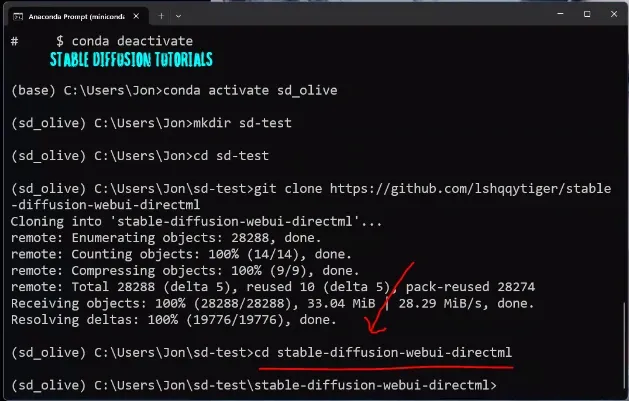
9. Move to your stable diffusion installed directory by typing:
cd stable-diffusion-webui-directml
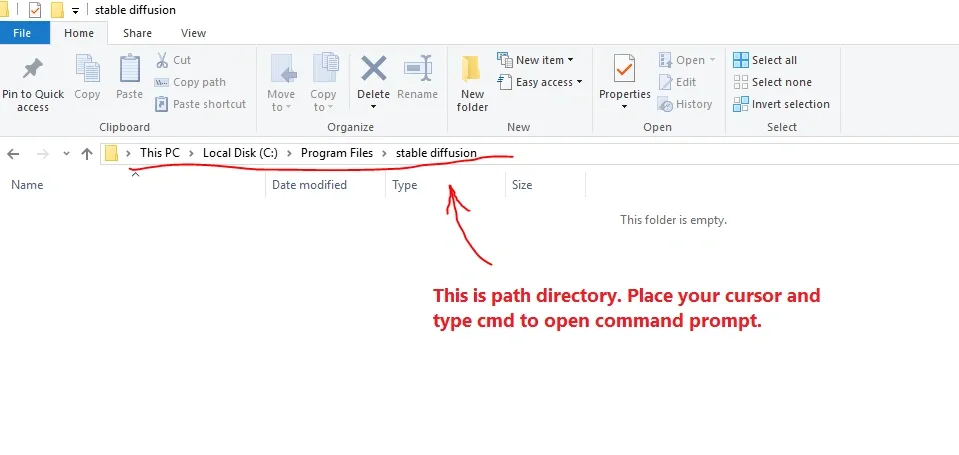
If you get an error “cannot find the path specified” Close your command prompt. And move to your stable diffusion installation folder. On the path directory type cmd and press Enter key to open command prompt. Repeat Step 5 and Step 6. In our case, we installed stable diffusion into C: drive.(It may be different in your case)
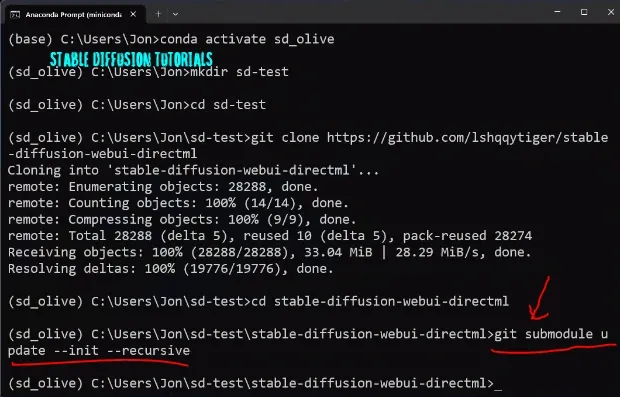
10. Update the submodule by typing this command:
git submodule update –init –recursive
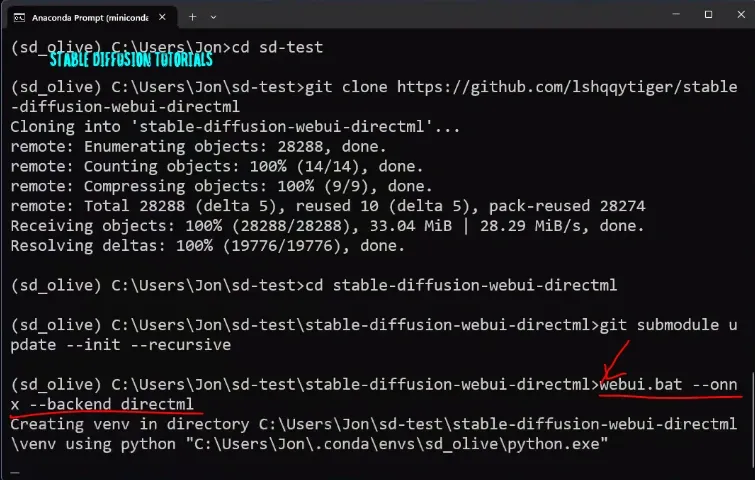
11. Open WebUI by typing:
webui-user.bat
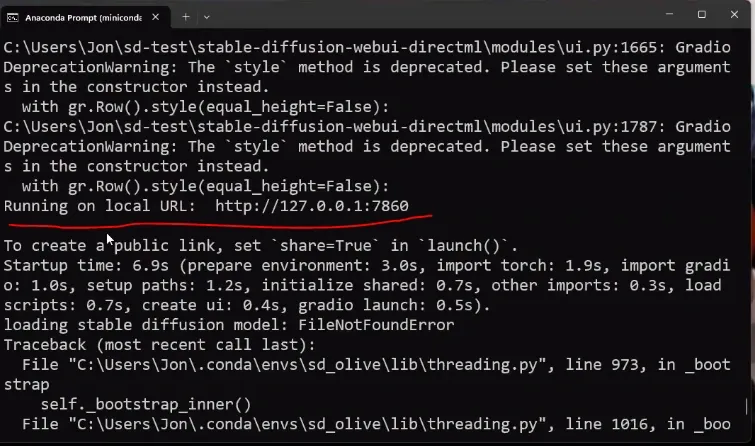
12. Now, a new local host web address will be seen like this “http://127.0.0…..“. Just copy and paste this URL into your web browser to open Automatic1111.
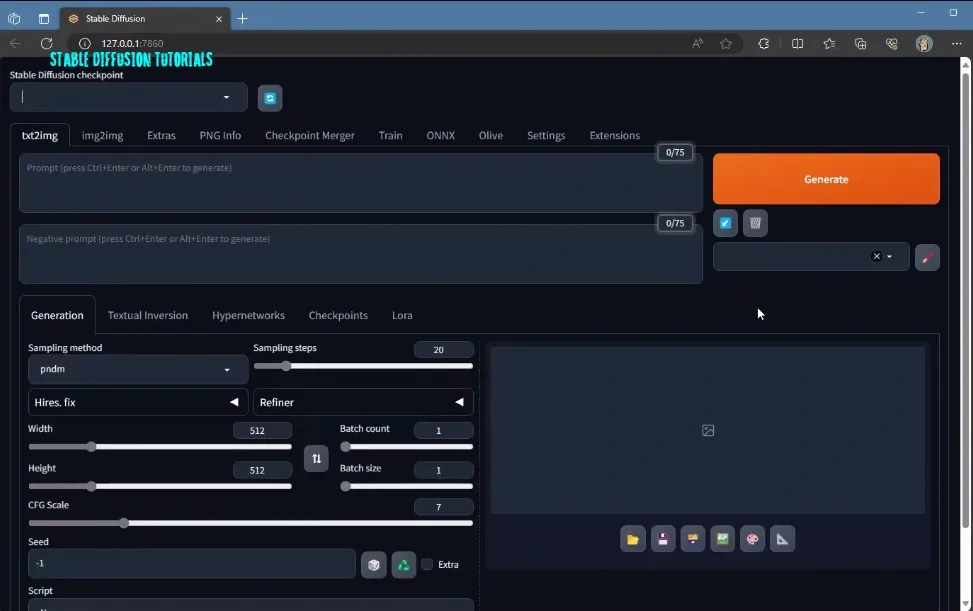
13. Finally, we have installed Automatic1111. Now, we have to download the supported model for Microsoft Olive which works for optimization.
Recently, we found many people are facing the issues related to installation. So, if you are getting the same then you should follow our AMD errors tutorial where we discussed multiple relevant solutions to fix it.
14. Now for generating an image and optimizing it, we need to download the required model.
Make sure you choose the right compatible model to download and run, because currently not every model on Hugging Face or CivitAI best supported with Microsoft Olive. Right now only Stable Diffusion 1.5 works good.
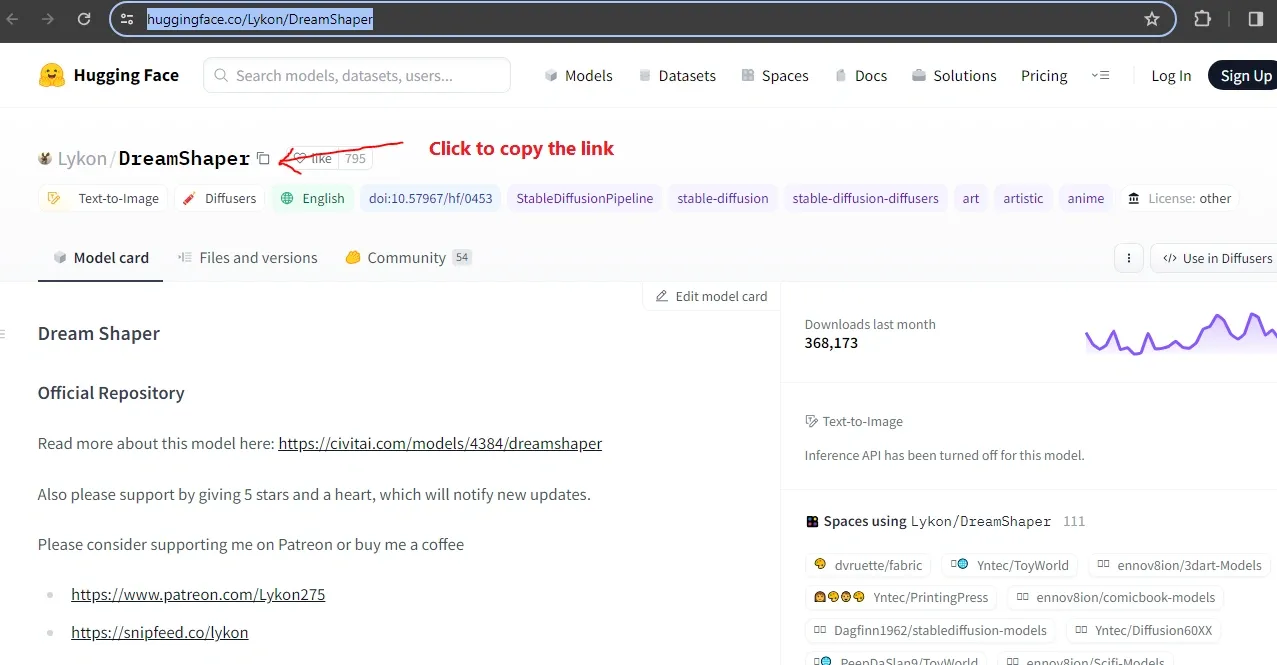
15. For illustration we have tested Dreamshaper model from hugging face.
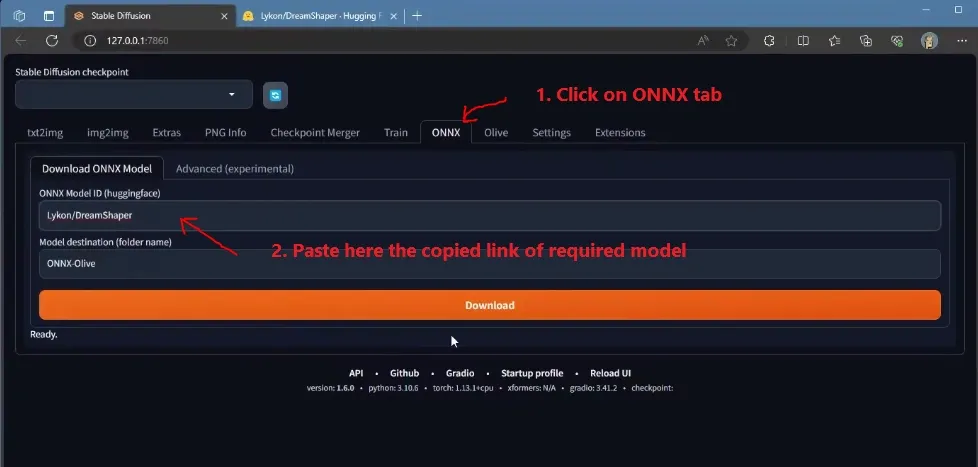
Now, go to Automatic1111 click on the ONNX tab, and paste the copied model ID into the input box. At last click on DOWNLOAD to download the model.
If you see a logo behind the download button that will be rotating, it means the model is in downloading state. This may take some time according to your internet speed because each model can be up to ~5-8 GB.
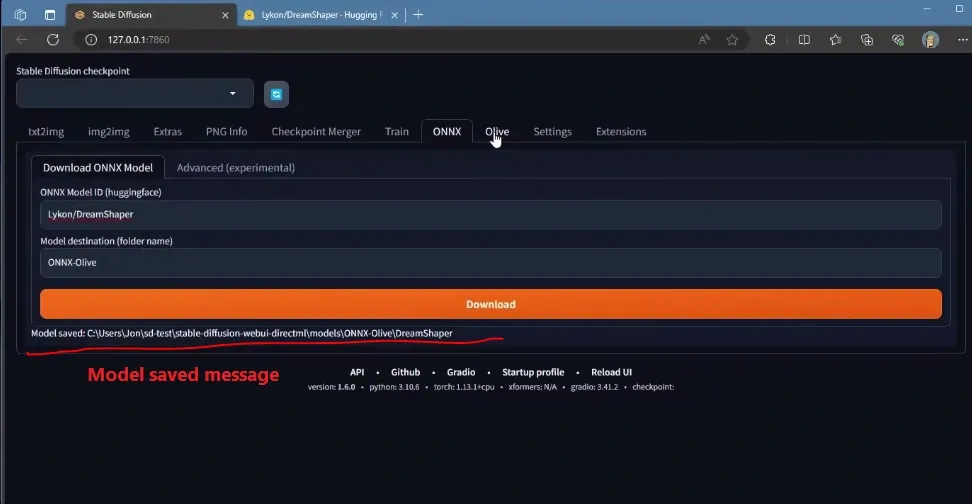
After downloading the model, you will get a confirmation message like this “Model saved C:/……..“
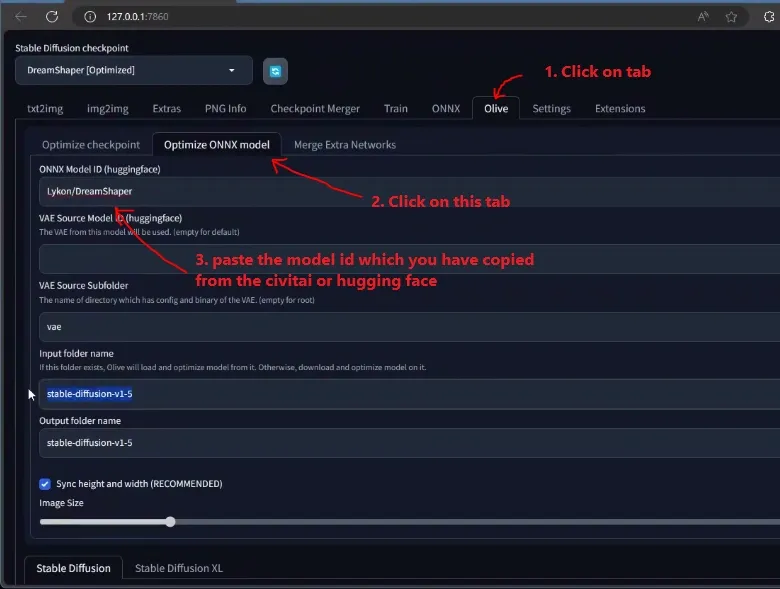
16. Now, we have to optimize using Microsoft Olive otherwise we will face errors. So, click on the Olive tab, then again click Optimized ONNX model, and under ONNX model id paste the copied ID of the model you have downloaded. In our case it’s “Lykon/DreamShaper“.
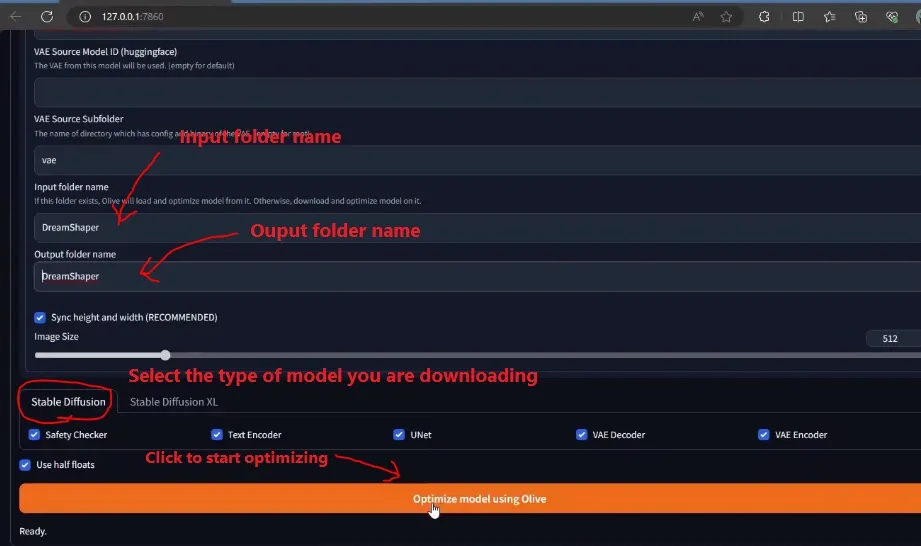
On the input and output folder also paste the same copied model’s ID remove everything with a slash (in our case it is “DreamShaper“) and select the type of model it is whether it is a normal Stable diffusion model or a Stable Diffusion XL model.
17. At last click on the “Optimize model using Olive” button to start optimizing.
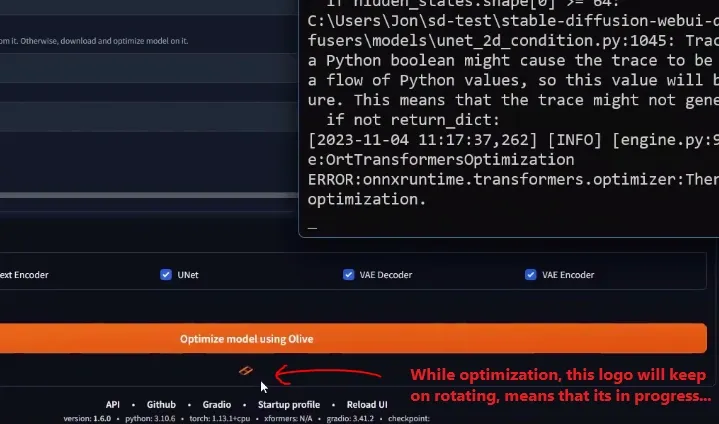
This will take time to optimize on the background. You can see the status on command prompt and a logo will keep on rotating means it in the process.

18. After a few minutes, you will see the message “Optimization complete“. In our case, it took around ~5 minutes.

19. Now, you can generate images by clicking the reload button and selecting the Optimized model version. Put positive, and negative prompts, settings, and click on the Generate button to generate an image.

And here is the output. Really the result is quite incredible and realistic. It took around 21 iterations/second.
No matter what model you use, but you can try our Stable Diffusion Prompt Generator which will help you to generate multiple AI image prompts.
Let’s try something else:


Here, while generating the above image art took around 18 iterations/second.
Extra tips:
If you want to check for confirmation for optimization, type this command to optimize stable diffusion by generating the ONNX model. It may take time to get optimized:
python stable_diffusion.py –optimize
After finishing the optimization the optimized model gets stored on the following folder:
oliveexamplesdirectmlstable_diffusionmodelsoptimizedrunwayml
And the model folder will be named as: “stable-diffusion-v1-5”
If you want to check what different models are supported then you can do so by typing this command:
python stable_diffusion.py –help
To check the optimized model, you can type:
python stable_diffusion.py –interactive –num_images 2
Installing ComfyUI:
ComfyUI a Nodes/graph/flowchart interface for stable Diffusion can be installed and run smoothly on AMD GPU machine. You just need to follow the simple steps for installation:

1. First of all, open your command prompt as administrator and install Anaconda/Miniconda (add path to directory) and GIT installed.
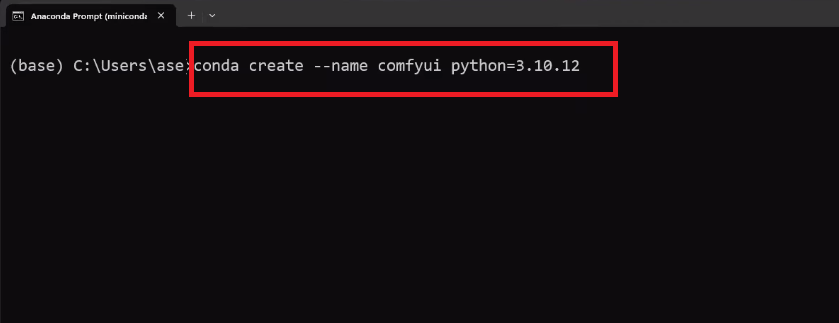
2. Next, create the new python virtual environment as “comfyui” by typing the command on command prompt. (Only python 3.10.x versions are supported):
conda create –name comfyui python=3.10.12
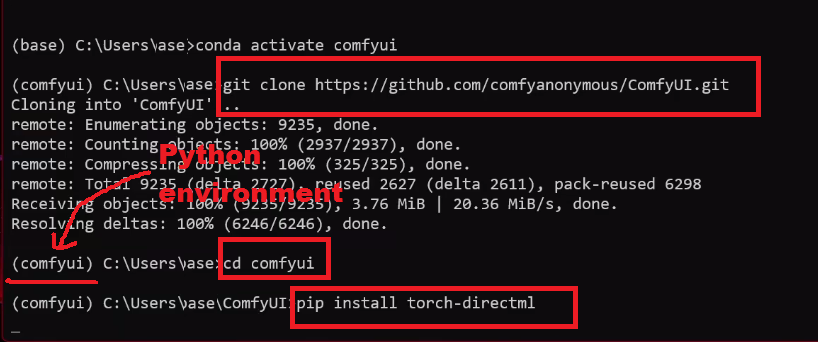
3. Activate the created python environment by typing:
conda activate comfyui
4. Now you have to clone the GitHub repository of ComfyUI. For this use this command:
git clone https://github.com/comfyanonymous/ComfyUI.git
5. Move to the ComfyUI directory (after entering into directory you will see the environment name in bracket at starting):
cd comfyui
6. Now to run the ComfyUI, you need to install perquisites like pytorch with directml for AMD GPU:
pip install torch-directml
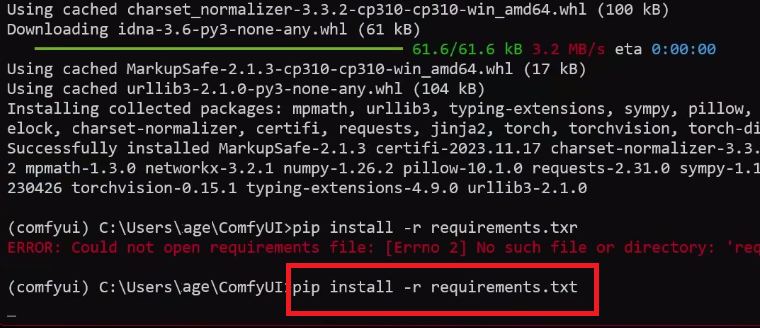
7. Installing the perquisites with requirements files:
pip install -r requirements.txt
8. Then you have to launch ComfyUI WebUI using this command:
python main.py –directml
A local URL will pop up with http://127.0.0.1… Just copy and paste into your browser to open your ComfyUI. We are using 7900 AMD GPU which giving us the iteration 5.63/second.
