We have listed all the Flux based workflows(IP Adpater, ControlNets, LoRAs) at one place so that you don’t need to jump to multiple articles.
To get into the workflows first of all, you need to install ComfyUI on your machine and get the Flux model installation.
As instructed by Xlabs, you need to use the Flux Dev official model released by Black Forest Labs that uses the Unet loader. This helps to handle large Flux models (FP16 variant).
They provided other options to work with lower end GPUs. you can also use Flux GGUF variant to manage 12GB VRAM memory usage. To use the Flux GGUF model variant, replace the “Load Diffusion Model” node with “UNET loader(GGUF)” node. You can find the “UNET Loader” from bootleg category.
Flux IP Adapter
The IP-Adapter for Flux Dev released by X-Labs. The model has been trained on 512 by 512 for 50k steps that means we have the flexibility to use 512 by 512 and 1024 by 1024 resolution for image generation.
Installation:
1. Move to “ComfyUI/custom_nodes” folder and navigate to folder path location and type “cmd” to open command prompt. The do the repository cloning use the cloning command:
git clone https://github.com/XLabs-AI/x-flux-comfyui.git
2. Now, you need to update custom nodes. Move into “ComfyUI/custom_nodes/x-flux-comfyui” folder. Double click to open “setup.py” file to start the update process. Restart ComfyUI. After this, you have to download models.

3. Download the IP Adapter model from Hugging Face, and save it inside “ComfyUI/models/xlabs/ipadapters” folder.

4. Next, you have to download Clip-L model(model.safetensors) from OpenAI’s HuggingFace, and save this to “ComfyUI/models/clip_vision” folder. Rename it to anything relevant to get easily identified.
5. Workflows can be found inside your “ComfyUI/custom_nodes/x-flux-comfyui/workflows” folder or it can be downloaded from Xlab’s Github repository.
Now to work with the workflow, use these nodes – Flux Load IPAdapter and Apply Flux IPAdapter nodes (strength shouldn’t be greater than 1), then select the relevant CLIP model from Dual Clip loader.
Set the recommended resolution as 512×512 or 1024×1024. At last click “Queue prompt” to get start the rendering.
Well, we tested and the results were not that satisfying. Actually as officially reported this is in beta stage. So, you need to try multiple times with tweaked settings to get perfect results.
Flux ControlNet
The ControlNET for Flux Dev released by X-Labs. Currently 3 models are supported Canny, HED, Depth (Midas).
Installation:
0. If you didn’t clone the Xlabs custom nodes yet then move to “ComfyUI/custom_nodes” folder and navigate to folder path location and type “cmd” to open command prompt. The do the repository cloning use the cloning command:
git clone https://github.com/XLabs-AI/x-flux-comfyui.git

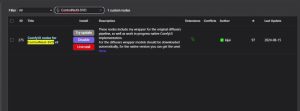
1. Now, you need to update custom nodes. From ComfyUI Manager select “Custom nodes manager” search for “controlnet auxilary preprocessor” and hit update button.
Alternative:
Move into “ComfyUI/custom_nodes/x-flux-comfyui” folder. Double click to open “setup.py” file to start the update process. Restart ComfyUI. After this, you have to download models.

2. Next , you need to download all the ControlNet models:
Save all the models inside “ComfyUI/models/xlabs/controlnets” folder.

3. Get the respective ControlNet workflow from your “ComfyUI/custom_nodes/x-flux-comfyui/workflows” folder or it can be downloaded from Hugging Face.
Here, ControlNetV1 used for 512×512 resolution. For 768 and 1024 dimensions use other ControlNets(V2/V3).
Flux LoRA
Xlabs trained multiple LoRAs like realism, anime, disney, art style, MidjouneyV6 on Flux Dev model. You can get the overall information about the Xlabs trained Flux LoRA models from their Github repository.
By following that you can train your LoRA for Flux models as well. Alternatively, you can checkout our tutorial for Flux LoRA training to get the overall understanding.
Installation:
0. If you didn’t clone the Xlabs custom nodes yet then move to “ComfyUI/custom_nodes” folder and go to folder address location and type “cmd” to open command prompt. Use this command to clone the repository:
git clone https://github.com/XLabs-AI/x-flux-comfyui.git

1. Download Flux LoRA models from Xlabs’s Hugging Face LoRA section. There are multiple types of LoRAs trained and listed by Xlabs. Just choose any of them or you can download all.
2. After downloading, save the models inside the “ComfyUI/models/xlabs/loras” folder.
3. Now, just restart and refresh ComfyUI to take effect.

4. Workflows for Flux LoRA can be found inside your “ComfyUI/custom_nodes/x-flux-comfyui/workflows” folder or you can download from Xlab’s Github repository.