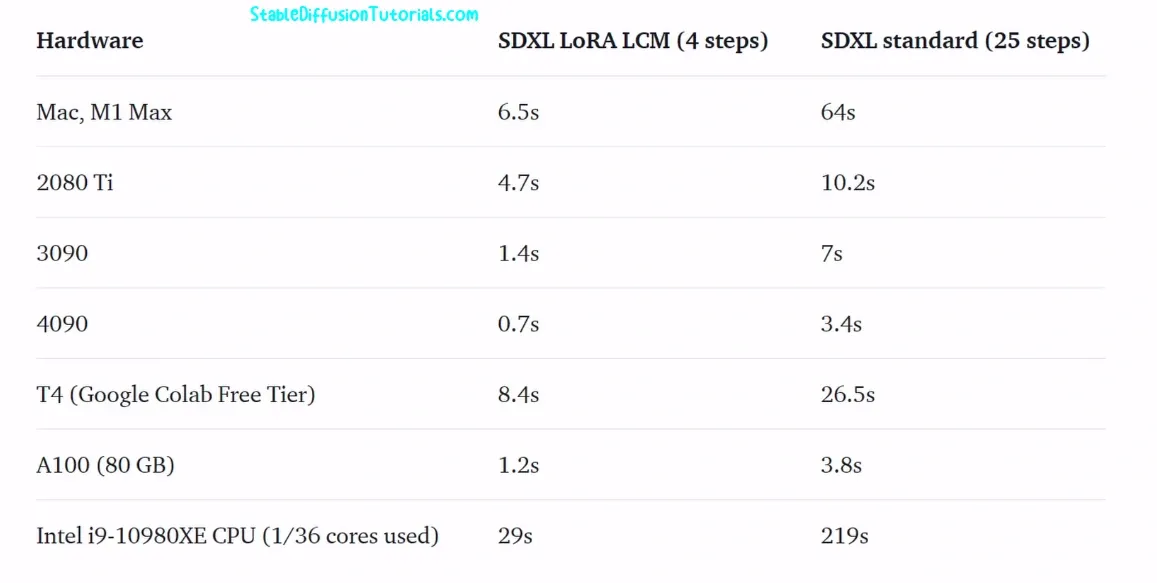
LCM-LoRA (Latent Consistency Models) generates the images with enhanced quality and faster inference. This model actually uses 2-4 sampling steps helps in faster generation when generated with 768 by 768 resolution.
The research paper explained how this model improves the slow iterative sampling process of Latent Diffusion models (LDMs). The model uses Latent Consistency Fine tuning method (LCF) which requires minimal steps inference on image data set.
LCM LoRA is used with pre-trained diffusion models like Stable Diffusion v1.5, Stable Diffusion base 1.0, and SSD-1B models. We will see how these models can be used with Stable Diffusion WebUIs and do the installation process.
Benefits:
- Faster image generation with minimal sampling steps
- Supported features such as img2img, txt2img, inpainting, AfterDetailer, AnimateDiff , ControlNet/T2I-Adapter
- Adding power to video generation
- Supports various Stable Diffusion models
- Helpful for processing output for Stable Diffusion applications
- No extra plugins required
- Easy embedded into workflow
- Minimalistic training
Installation for Automatic1111:
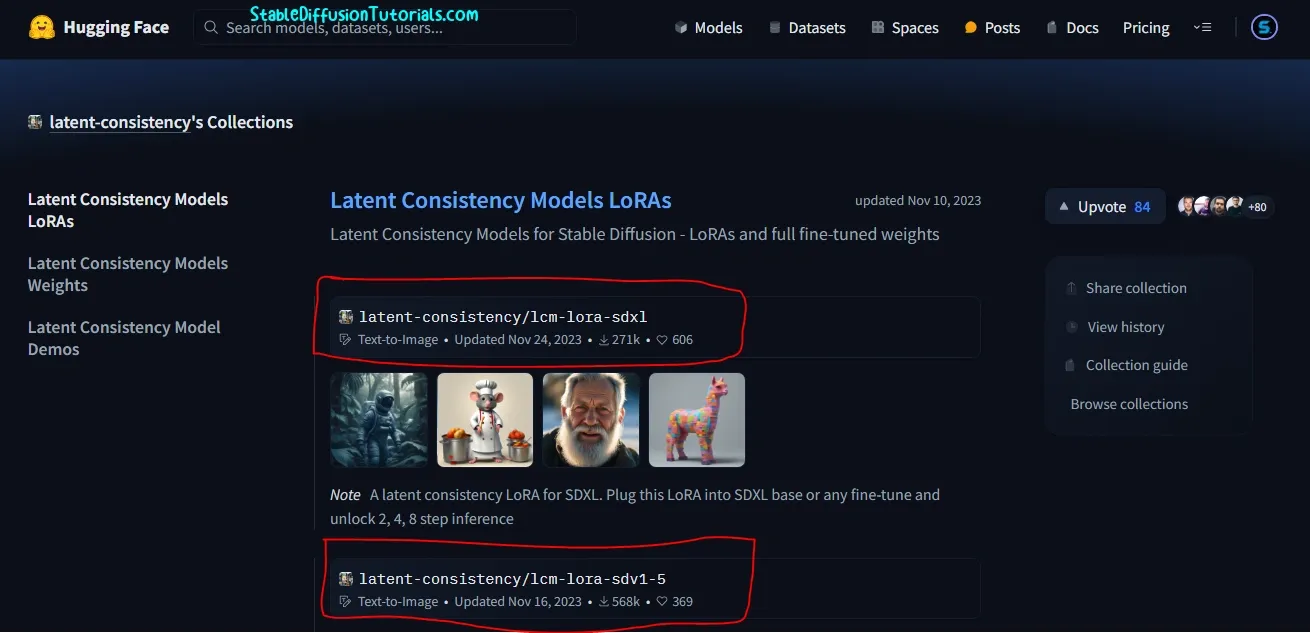
1. First of all, you need to download the LCM-LoRA models from hugging face platform.
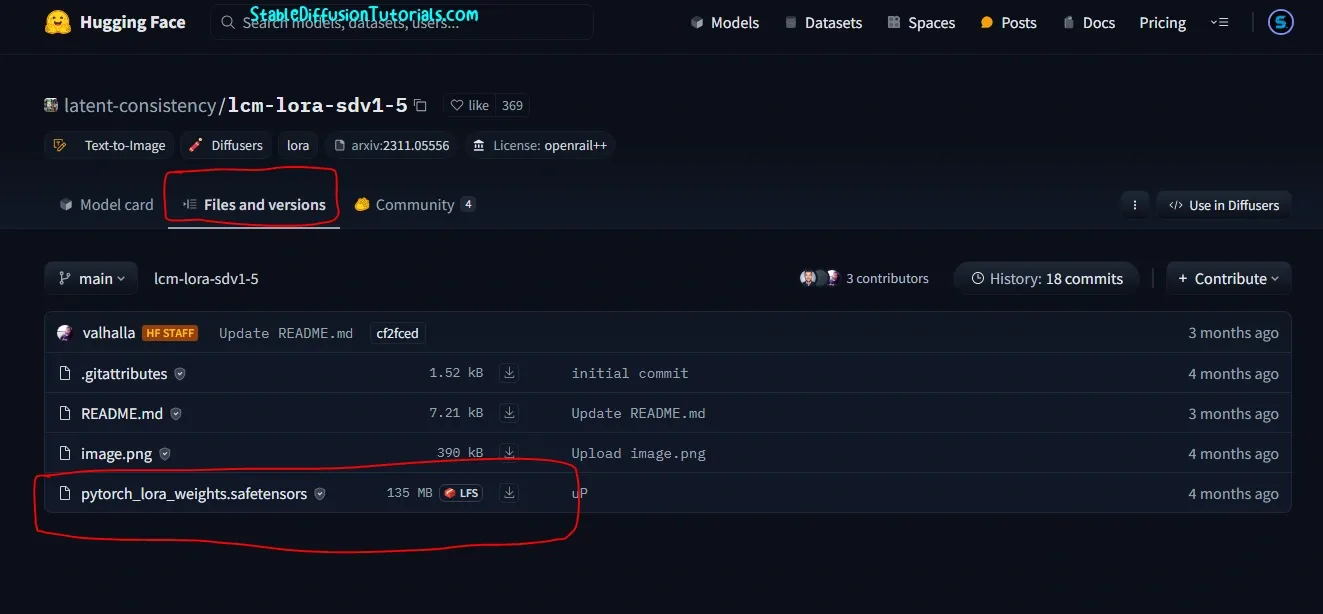
2. Here, we are using Stable Diffusion XL and Stable Diffusion v1.5 base checkpoints, so we have to download these two (LCM-LORA-SDXL and LCM-LORA-SDv1.5 ) models.
3. Download and rename it to anything as your requirement like “LCM-SD1.5.safetensors” (for better recalling).
If you are a windows user, then you need to enable the option “File name extensions” under Menu section otherwise you can’t rename the files with its extensions.

Now, move into your “stable-diffusion-webuimodelsLora” folder, where “stable-diffusion-webui” is the root folder for Stable Diffusion files.
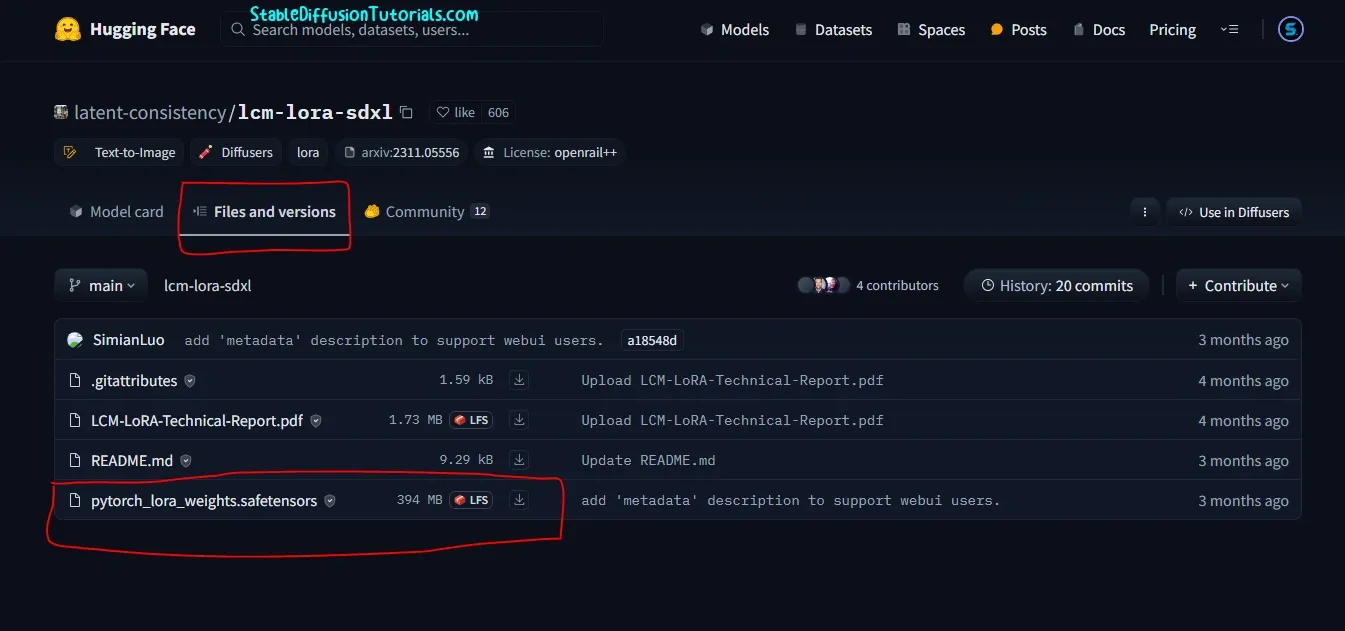
4. Again do same for LCM-LORA-SDXL model. Rename it to anything like “LCM-SDXL.safetensors” and save into similar LoRA directory.
5. Now, start your Automatic 1111 and you will see a LoRA tab.
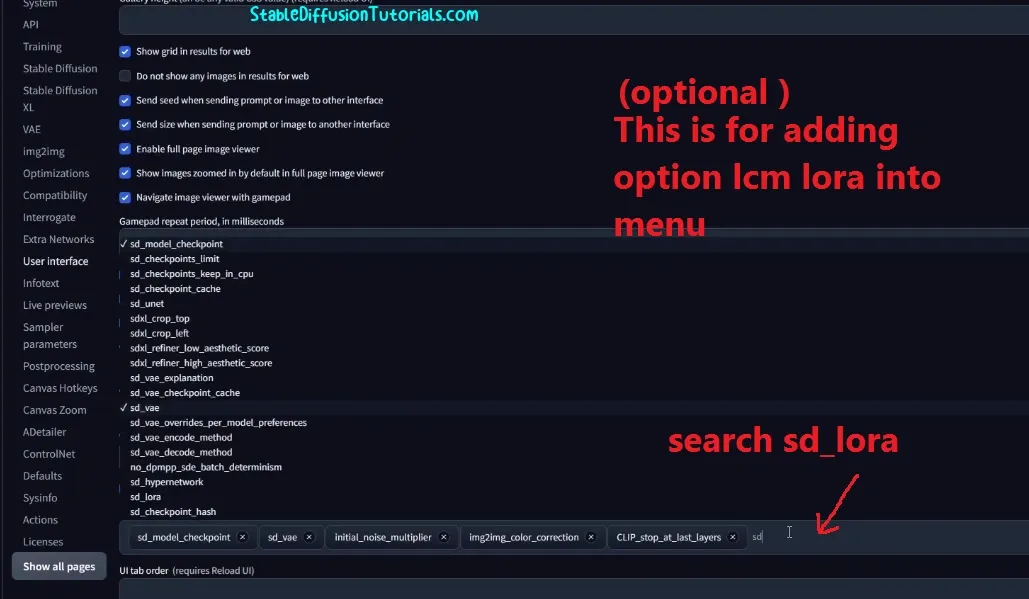
If you want additional option for LCM Lora into Automatic1111 WebUI like extra tab then you need to move to Setting>User Interface (search sd_lora). This is optional for faster accessing lcm lora as feature into your WebUI.
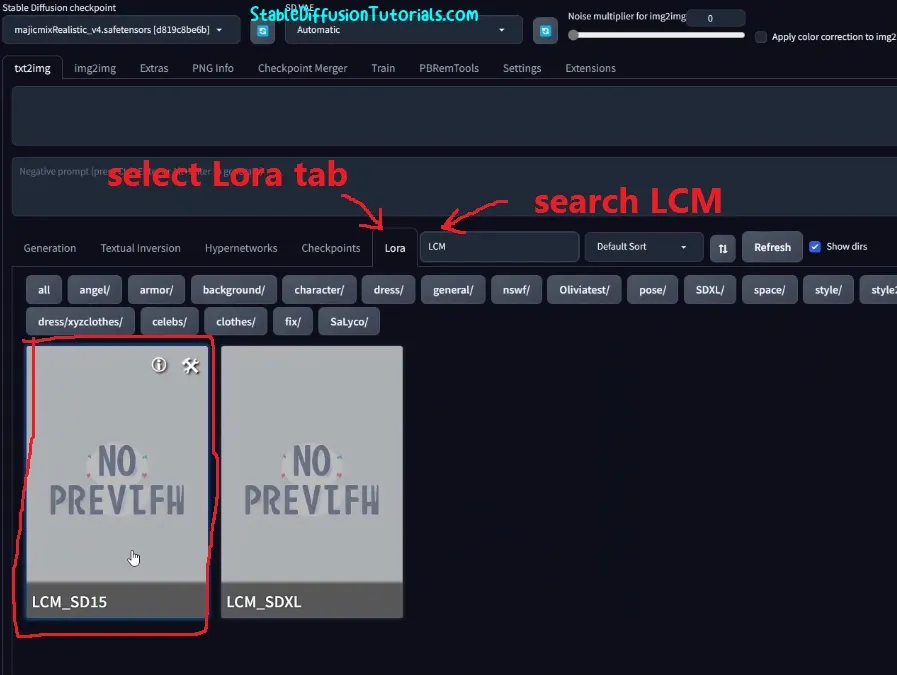
6. Or just go to Lora tab, search for “LCM” and you will get the downloaded LCM lora models. Select any one of them as requirements.
-Input your positive and negative prompts as usual.
-We have SD1.5 checkpoints so we have selected the LCM LORA SDv1.5 model.
-Now setup sampling steps from 2-8 (recommended).
-and set CFG scale from 1-2.
and Hit “generate” button.
In normal scenario, we use 25-55 sampling steps to generate an image, but if you are using Lcm LoRA model then its recommended to use the range from 2-4.
We are using RTX 3070 and for generating without LCM LORA, it takes almost 25 seconds for 1024 by 1024 resolution of images.
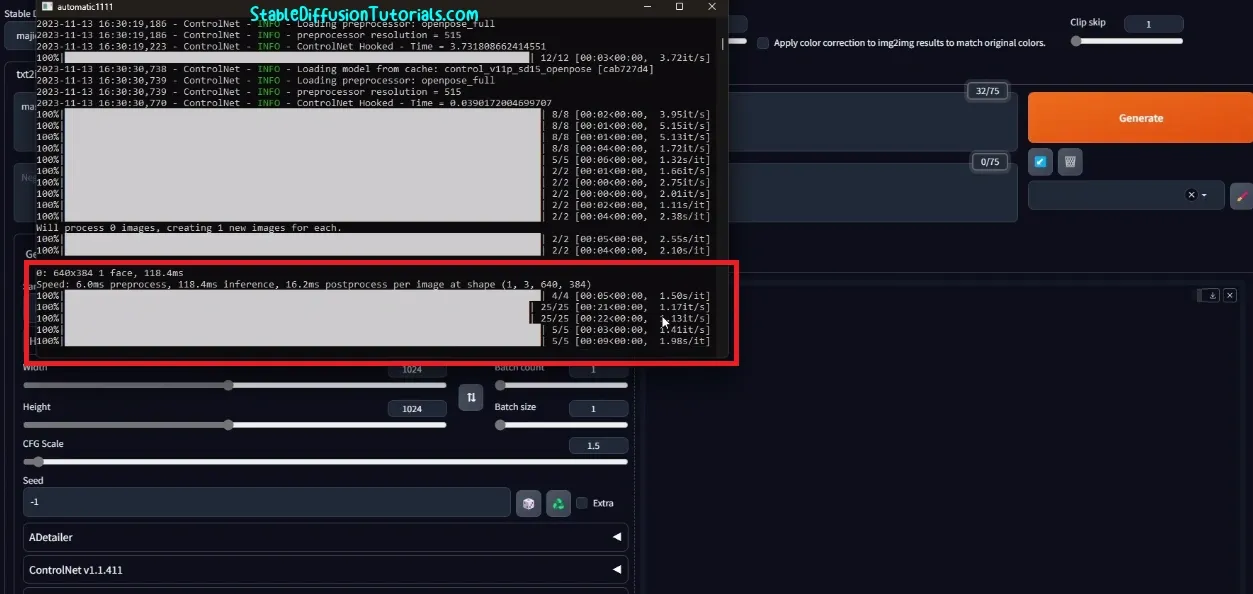
After using Lcm Lora model its took almost 5-7 seconds without effecting the quality.
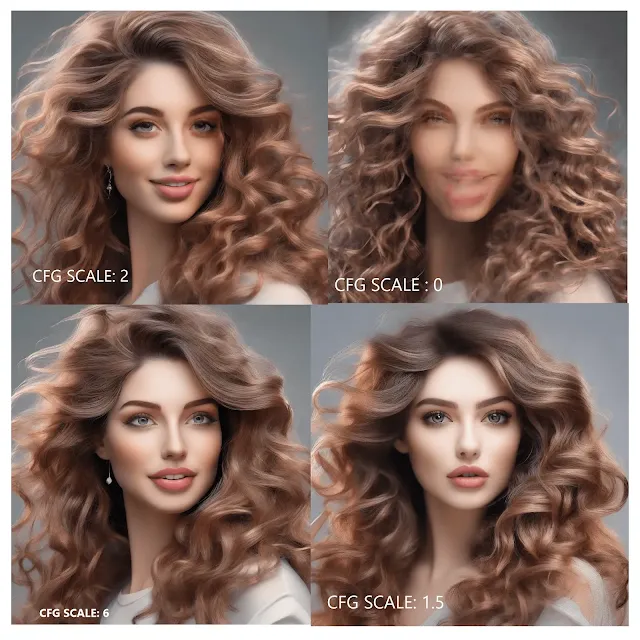
Now we have tested with different CFG scale, and with higher or lower value it creates really blurry weird ugly images. So, its recommended to set your CFG scale ranging from 1-2 for better optimized output. If you want to increase the CFG scale then its a must to decrease the Lora weights (probably 0.5) into your prompts.
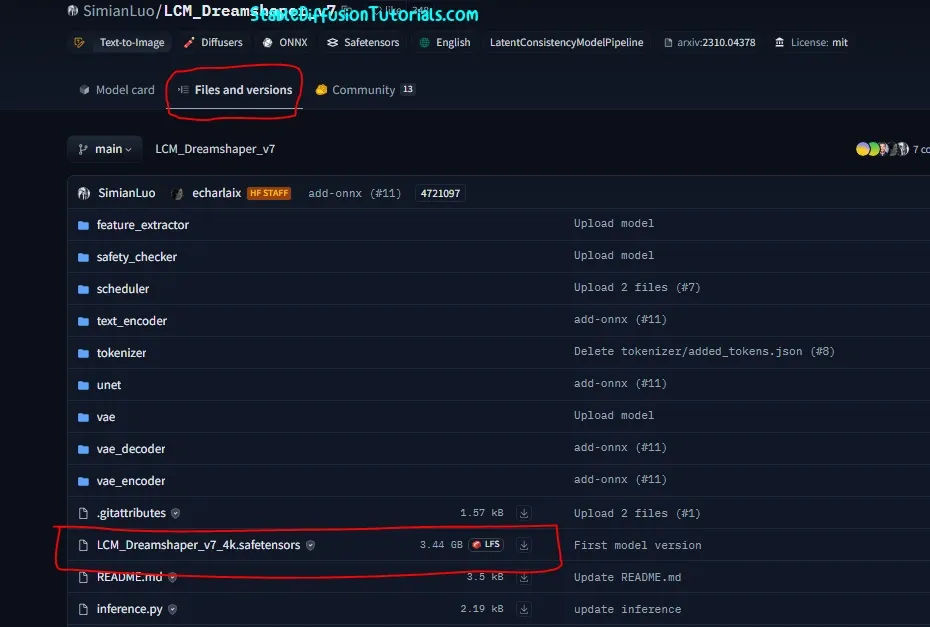
You can also download and use the Dreamshaper LCM model (fine tuned with LCM don’t require LoRA) from hugging face like other Stable Diffusion models and save it into the “models” folder.
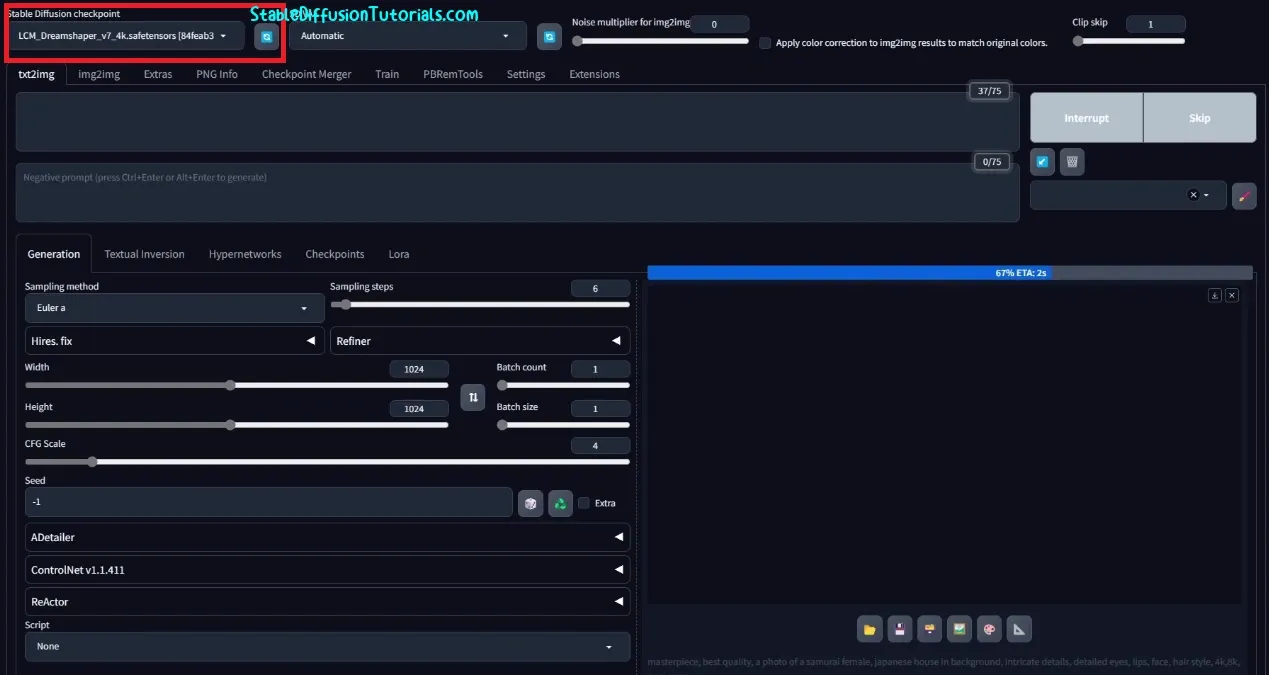
To use this model, just select from the “Stable Diffusion checkpoints” options and generate the images.
Conclusion:
LCM LoRA makes your image generation faster when compared with normal inference. It doesn’t fast the Stable diffusion models rather it helps to generate images with lesser sampling steps and CFG scale. The great aspect about Lcm Lora is that you can use it with any widely used diffusion models like Stable Diffusion XL and Stable diffusion v1.5.

